Monday, July 30, 2012

strawberry cheesecake sundae party!


If you’re looking for the perfect way to cool down on a hot summer day, then look no further. This special sundae made with vanilla ice cream, real whipped cream, CHEESECAKE and fresh strawberries will do the trick!
This creative combination was inspired by the fast food drive thru restaurant, Ralley's aka Checkers. We don't have Ralley's or Checkers in Utah but my mom told me about this amazing dessert & on a recent trip to Indiana I HAD to try it. It was everything she said & more! But I dare say, homemade is even better!

As soon as I got home I set out to recreate the strawberry cheesecake sundae. I googled it to get another look at it & low & behold I found a video of the restaurant's VP of research & development making one! That was EASY! Feel free to skip the rest of this post & click the video below to watch Mr. V.P. do his thing.


I must warn you about this Philadelphia Cheesecake Filling...it's DANGEROUS. Only buy it if you have a plan to use the whole thing, divided by 8 people, immediately . If it sits in the fridge unattended for more than a day it will do a magic trick & disappear from your fridge & reappear on your hips! I will probably never buy it again...it's that risky decadent! I also think it would be delicious piped into strawberries.

I made homemade strawberry sauce but this is a super quick & simple dessert! You could make it even easier with store bought strawberry syrup & just throw a few fresh strawberries in.
sundae ingredients:

Graham crackers, crushed in food processor
Philadelphia cheesecake filing
Strawberry Sauce, see below
Additional sliced strawberries 
Vanilla bean ice cream
Whipped cream

sundae directions:

Layer the following in each individual sundae dish:
 
1 tablespoon crushed graham crackers
1 ice cream scoop Philadelphia cheesecake filling (1/4 cup)
1 tablespoon of strawberry sauce
sliced strawberries
4 large swirls vanilla soft serve (or 3 scoops vanilla ice cream)
2 tablespoons strawberry sauce
sliced strawberries
1 tablespoon crushed graham cracker
2 puffs real whipped cream (more!)
Cherry (Strawberry!)
For Strawberry Sauce: Clean & slice 1 pound strawberries, place in a saucepan and stir in 1/3 cup sugar and 1 teaspoon vanilla extract. Cook, stirring occasionally, over medium heat for 5 minutes. Remove from heat and puree in a blender until smooth. Will thicken upon cooling. Store in refrigerator and serve cold. This will make lots of extra sauce. Delicious served over cheesecake or ice cream or use it in smoothies or milkshakes or drizzle over pound cake or crepes!


Tuesday, July 24, 2012

mini no bake nutella cheesecakes party!


My Nutella obsessed teenager, Monica, has been creating up a storm in the kitchen! She recently made homemade Nutella ice cream (to die for) & now she has made these gorgeous No Bake Nutella Cheesecakes! If you haven’t tried Nutella it’s a chocolate hazelnut spread that is DELICIOUS served on pancakes, crepes, rice krispies treats, ice cream, fresh strawberries, or straight out of the jar on a spoon. 

This is a recipe she discovered & created & I happily devoured! It’s light & airy & thick & creamy & chocolatey! The no-bake makes it a PERFECT Summer treat. Another benefit is that it was twice as good the 2nd day! Make-ahead AND no-bake…what are you waiting for?
Mini No Bake Nutella Cheesecakes

Recipe Source:  My Baking Addiction

ingredients:

12 Oreo Cookies (she used Kroger brand with chocolate cream)
3 tablespoons butter, melted
1 package (8 oz.) cream cheese, softened (feel free to use light)
2/3 cup Nutella
1 teaspoon pure vanilla extract
1 container (8 oz.) Cool Whip, thawed (feel free to use light Cool Whip OR whip up your own heavy cream, as shown HERE)

Optional for garnishing: additional Cool Whip, chopped hazelnuts, chocolate chips, additional crushed Oreos

directions:

1. For crust: crush cookies in a food processor or in a Ziploc bag with a rolling pin. Stir together in a small bowl with the melted butter.

2. Divide crust into 4 individual serving glasses. You could also make this in a 9” pie pan.  Press crust lightly into the bottom of the dish(es). Set aside.

3. For filling: Beat softened cream cheese & nutella with an electric mixer until very smooth. Add vanilla & mix until combined. 

4. With a rubber spatula, fold the Cool Whip into the Nutella/cream cheese mixture until well blended. This takes awhile so just keep folding.

5. Pipe the filling from a piping bag or spoon it into the glasses on top of the crust.

6. Refrigerate until ready to serve or garnish as desired with optional garnishments. Monica piped extra Cool Whip on top & sprinkled with chopped hazelnuts. Refrigerate until ready to serve.

 P.S. My daughter used 4 10 oz. martini glasses & they were large desserts. You could easily use smaller serving dishes & make this into 6 servings. They stay perfect in the fridge for up to 3 days. If you use homemade whipped cream that is not stabilized (instead of Cool Whip), the cream will deflate & they should not be stored in the fridge more than 1 day.

She had some extra cheesecake filling that she piped between two mini 'nilla wafers & rolled the sides in chopped hazelnuts. Mmmmmmm!!! 


Monday, July 9, 2012

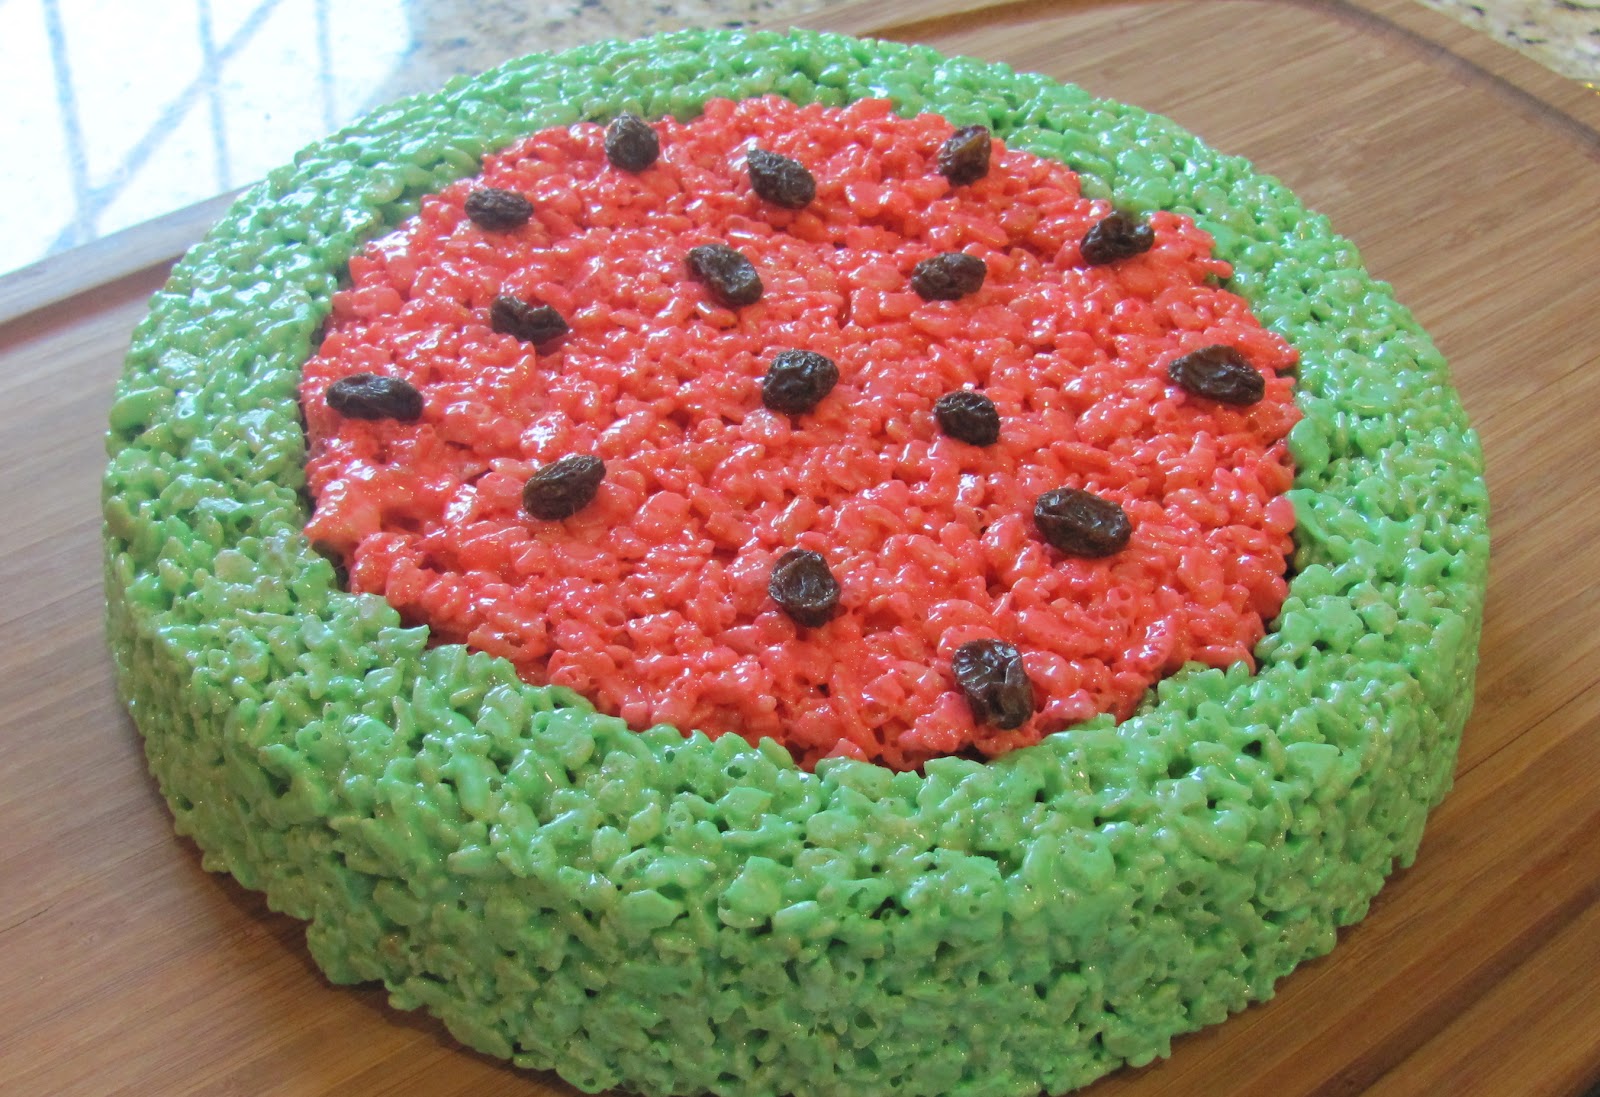
watermelon rice krispies treats party!


I feel very blessed to be part of the organization, Desserts for the Deserving. Desserts for the Deserving was established in 2011 with the sole purpose of bringing a little bit of sunshine to the lives of strangers. Bloggers, bakers & crafters offer their time and resources and are matched up with a family or individual who has been nominated for a random act of kindness.

The family I have been matched up with is Derrick & Ruth & their children. I know a batch of cookies will not ease the pain they are suffering from the very recent loss of their beautiful sweet baby. I have been praying for them since the day I received their nomination. I hope they know that people care about them & love them, even strangers.

Today I spent several hours thinking of Derrick & Ruth while I prepared cinnamon rolls, peanut butter-chocolate chip-oatmeal cookies (minus the m&ms) and these Rice Krispies treats! I packaged them up & shipped them off. I think these would brighten your day too! They are a snap to make & would be a fun no-bake treat for a Summer BBQ or kid's birthday party.

I saw these ADORABLE rice krispies treats from last year at Dine & Dish and couldn't wait to make them. Their recipe calls for strawberry flavored marshmallows and lime Kool-Aid but I just couldn't adulterate the scrumptious classic Rice Krispies Treats recipe. So I used food coloring to make my watermelon & rind.

Watermelon Shaped Rice Krispy Treats

ingredients

6 Tablespoons butter, divided in 2
6 cups mini marshmallows, divided in 2
8 cups Rice Krispies, divided in 2
Green & red food coloring
chocolate chips or raisins for "seeds"

1. Melt 3 tablespoons butter in a large saucepan over medium heat. Add 3 cups mini marshmallows & stir until melted. Remove from heat & stir in some green food coloring until its the color you want. I just poured a bit from the bottle. I didn't measure but it was probably about 1/2 teaspoon. Stir in 4 cups Rice Krispies until completely coated.

2. Scoop green Krispies mixture into a well buttered 9 inch round cake pan. Butter your hands or a spoon and press it around the outer edge of the cake pan to form a ring. Set aside. Wash your large saucepan so you can reuse it for the red.


3. Repeat step 1 except add red food coloring. At this point my teenager came in the kitchen & said, "Why in the world are you making a Christmas wreath in July?" I said, "You'll see."

4. Scoop red Krispies mixture into the center of the cake pan. Press to be level with the green outer ring.


5. After mixture completely cools place a few raisins or chocolate chips on top as seeds. Turn pan upside down to remove from pan. Slice into wedges & serve or put them on lollipop sticks & package for gifts! I cut mine into 8 large wedges but you could definitely cut it smaller. I promise no one will mistake them for Christmas wreaths!

Friday, June 15, 2012

blueberry buttermilk pancakes party!


CLICK TO PRINT RECIPE ONLY
 Homemade pancakes was the first recipe I mastered at around age 8, probably because pancakes were my FAVORITE food as a kid. My mom wasn't big on convenience foods and I don't think we ever had pancake mix in the house. If we wanted something to eat that we didn't have we got out a cookbook and made it from scratch. We also walked 5 miles to school, uphill, both ways, ha!

Homemade pancakes are so easy & delicious & quick too! You can even mix up a batch of the dry ingredients and store it in the pantry to have a head start on your weekend breakfast! Then just mix in the eggs, melted butter, buttermilk and vanilla when you are ready to make them.

I still love pancakes and I make them as often as my family will allow possible. Sunday morning breakfast at our house usually includes homemade waffles, which are Mark and Monica's favorite, but sometimes I talk them into PANCAKES and these blueberry buttermilk are my very favorite.


Blueberry Buttermilk Pancakes

makes 4 servings, about 16 pancakes

ingredients:

2 eggs
2 cups all-purpose flour
1/4 cup sugar
2 teaspoons baking powder
1 teaspoon baking soda
1 teaspoon salt
2 1/4 cups buttermilk, I use low-fat buttermilk & it works perfectly
4 tablespoons butter, melted
1 teaspoon vanilla extract
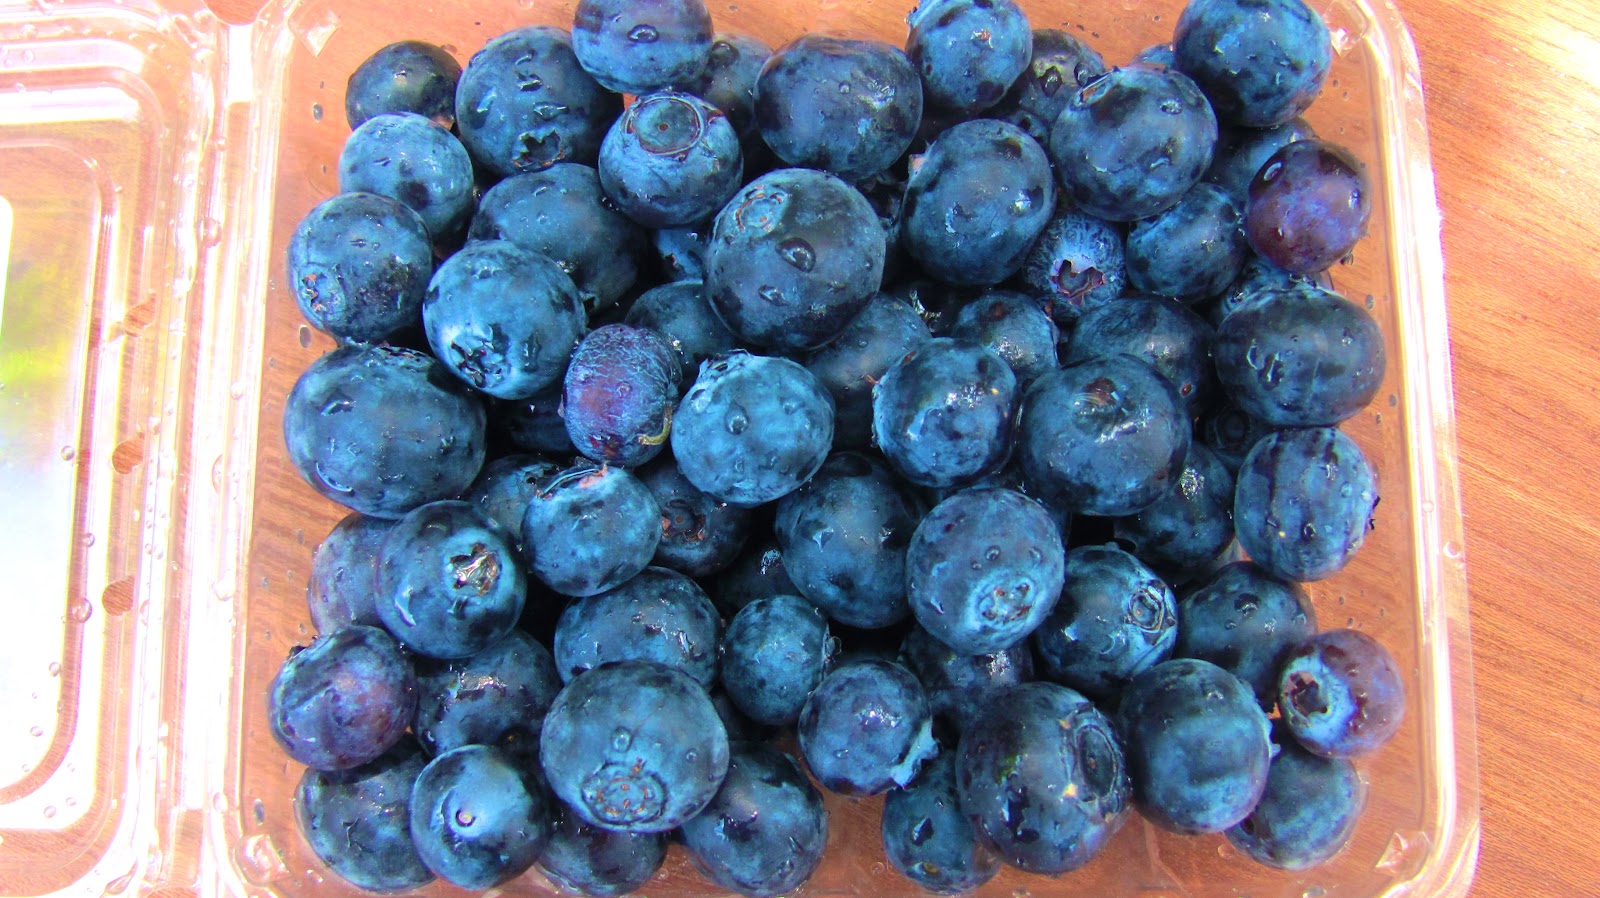
1 cup fresh blueberries
powdered sugar, butter & maple syrup to serve

directions:

1. In a mixing bowl, beat the eggs with an electric mixer until frothy. Add the flour, sugar, baking powder, baking soda, salt, buttermilk, melted butter & vanilla. I just dump it all in and then stir until the batter is smooth and has no lumps of flour remaining. Do not over mix. Batter will be thick.

2. Heat an electric griddle to medium-high heat. Spray griddle with cooking spray. Spoon about 1/3 cup batter onto the griddle for each pancake. You may need to spread it a bit with the back of a spoon since the batter is very thick. Scatter some blueberries over each pancake.


3. Cook until bubbles form on top and the batter is set, 1 to 2 minutes.


4. Flip the pancakes over & cook until golden brown on the other side, 2 to 3 minutes.


5. Keep warm in a 225 degree oven while cooking the remaining pancakes.


6. Dust with powdered sugar and serve warm with butter and maple syrup.


 P.S. If you don't have an electric griddle you can use a skillet on the stove but the griddle really makes a difference. The pancakes cook more evenly on a griddle & you can cook more pancakes at a time.


Tuesday, June 12, 2012

chocolate chocolate chip muffins party!


What a GREAT way to start your day! These bakery style muffins are moist, chocolaty & delicious! Many chocolate muffins I’ve had taste more like a cupcake. But this is a TRUE muffin, not as sweet as a cupcake & of course, no frosting. 


Chocolate Chocolate Chip Muffins 
 recipe adapted from:  Cinnamon Spice & Everything Nice

ingredients:
 
1/2 cup butter, softened
2/3 cup unsweetened cocoa powder
1 cup sugar
2 teaspoons baking powder
1/2 teaspoon salt
2 teaspoons vanilla extract
2 eggs
3/4 cup milk
1/3 cup  nonfat plain yogurt
2 cups all purpose flour (I used 1 1/2 cups all purpose & 1/2 cup wheat flour)
1 12 oz. pkg. chocolate chips, divided (I used semi-sweet but milk chocolate would be great too)
1 tablespoon coarse sugar, optional

directions:

1. Preheat oven to 400 degrees. Grease 12 cup muffin tin or line with baking cups. I greased my muffin tin well with Crisco on a paper towel & they came out perfectly with no sticking at all.

2. In a large mixing bowl, mix together butter, sugar, cocoa powder, baking powder, salt & vanilla. Beat in eggs, stir in milk and yogurt. Mix in flour. Stir in 1 1/2 cups of the chocolate chips. Reserve 1/2 cup chocolate chips for topping.

3. Divide batter equally between the muffin cups. THEY WILL BE FULL. Sprinkle each muffin with the remaining 1/2 cup chocolate chips & some coarse sugar, if desired.


4. Bake for 5 minutes at 400 degrees. *Without removing the muffins from the oven, decrease oven temperature to 350 degrees & bake for an additional 13-15 minutes or until a toothpick inserted near the center comes out without batter. Chocolate from the chocolate chips on the toothpick is fine. Avoid over baking or they will be dry. Remove from oven & cool on wire rack for 10 minutes. Remove muffins from pan to wire rack & cool completely.

*Starting at a higher temp & then decreasing it gives the muffins this beautiful high rise. 

 P.S. I like to bake my muffins directly in the muffin pan and I use baking cups to serve them in. 


Friday, June 8, 2012

peanut butter chocolate chip oatmeal cookies with m&m's party!

Shown above with multi-colored m&m's! 
Shown below with school colors...GO Hawks!


This is a beloved recipe from our extended family cookbook we put together about 12 years ago. The recipe is an original from my mom. The peanut butter, chocolate chips & oatmeal combination is the golden key to cookie perfection! Thanks, Mom!

I like to add m&m's for a double dose of chocolate. You can definitely make these without the m&ms and they are just as yummy. I made these today in school colors for some awesome 2012 Alta High School graduates.


I like to make these cookies small, almost bite sized. They don't spread much and they are thick & chewy in the middle. I always slightly under bake my cookies because I like them soft with only a teensy crunch on the edges.

Chocolate Chip Peanut Butter Oatmeal M&M Cookies
makes 90 small cookies

ingredients:

1 cup butter, room temperature
1 cup peanut butter (I use smooth, Mom uses chunky)
1 cup sugar
1 cup brown sugar
2 large eggs
1 teaspoon vanilla extract
1 1/2 cups flour
2 cups old fashioned oats
1 teaspoon baking powder
1 teaspoon baking soda
1/4 teaspoon salt
12 oz. chocolate chips (I use mini, Mom uses mega)
1/2 cup chopped pecans, optional
1 cup m&m's, optional

directions:

1. Preheat oven to 375 degrees. Cream butter, peanut butter, sugar & brown sugar together. Add eggs and vanilla and blend. Mix in flour, oats, baking powder, baking soda & salt. Stir in chocolate chips and nuts.

2. Lightly spray cookie sheet with cooking spray and drop cookie dough by tablespoon onto pan. I use my small Pampered Chef scoop to measure the cookie dough.

3. Bake 5-6 minutes. (mine were perfect at 5 minutes) Remove cookie sheet from oven & press m&m's into the tops of the cookies. Place back in oven & bake an additional 2 minutes.
4. Cool on baking sheet for 2 minutes then remove to cooling rack.

Congratulations class of 2012!


Cookie tip: If you are making cookies & they go flat when baked and you don't want them to, your butter may be too soft. You can try adding an extra 1/4 cup of flour or refrigerate your cookie dough for about 45 minutes & between batches.


Tuesday, May 8, 2012

triple chocolate mousse cake party!


Chocolate mousse cake sounds good, right? Well this isn't just chocolate mousse cake or even double chocolate mousse cake...it's TRIPLE CHOCOLATE MOUSSE CAKE! That's right, chocolate in all 3 luscious layers. The bottom layer is a deep dark chocolate fudge cake. The middle layer is thick & rich chocolate mousse & the top layer is sweet, light & creamy white chocolate mousse.
After reading through this recipe a couple of times I was sure it was going to be easier than it sounded. But I have to admit that this was one of the biggest pain in the butt recipes I've ever made. Be prepared to wash your mixer bowl & whisk attachment or beaters for every layer. Thankfully the recipe is totally worth it. We were having company for dinner & I needed an impressive dessert. It definitely qualified!

 For the bittersweet chocolate in layers 1 & 2 I used Ghirardelli Bittersweet Chocolate Baking Bars.


I found the recipe at Delicious Dishings & the original source is Cooks Illustrated.

ingredients

Bottom Layer
  • 6 tablespoons (3/4 stick) unsalted butter, cut into 6 pieces, plus extra for greasing pan
  • 7 ounces bittersweet chocolate, chopped fine
  • 3/4 teaspoon instant espresso powder (I omitted)
  • 1 1/2 teaspoons vanilla extract
  • 4 large eggs, separated
  • pinch table salt
  • 1/3 cup packed light brown sugar

Middle Layer
  • 2 tablespoons cocoa powder
  • 5 tablespoons hot water
  • 7 ounces bittersweet chocolate, chopped fine
  • 1 1/2 cups cold heavy cream
  • 1 tablespoon granulated sugar
  • 1/8 teaspoon table salt
Top Layer 
  • 3/4 teaspoon powdered gelatin
  • 1 tablespoon water
  • 6 ounces white chocolate chips
  • 1 1/2 cups cold heavy cream
  • Shaved chocolate or cocoa powder for serving, optional
directions
  1. FOR THE BOTTOM LAYER: Pre-heat oven to 325 degrees. Butter bottom and sides of 91/2-inch springform pan. Melt butter, chocolate, and espresso powder in large microwave safe bowl in microwave at 70% power, stirring ever minute until smooth. Remove from heat and cool mixture slightly, about 5 minutes. Whisk in vanilla and egg yolks; set aside.
     
  2. In stand mixer fitted with whisk attachment, beat egg whites and salt at medium speed until frothy, about 30 seconds. Add half of brown sugar and beat until combined, about 15 seconds. Add remaining brown sugar and beat at high speed until soft peaks form when whisk is lifted, about 1 minute longer, scraping down sides halfway through. Using whisk, fold one-third of beaten egg whites into chocolate mixture to lighten. Using rubber spatula, fold in remaining egg whites until no white streaks remain. Carefully transfer batter to prepared springform pan, gently smoothing top with offset spatula.

  3. Bake until cake has risen, is firm around edges, and center has just set but is still soft (center of cake will spring back after pressing gently with finger), 13 to 18 minutes. Transfer cake to wire rack to cool completely, about 1 hour. (Cake will collapse some as it cools.) Do not remove cake from pan.
  4. FOR THE MIDDLE LAYER: Combine cocoa powder and hot water in small bowl; set aside. Melt chocolate in microwave safe bowl in microwave at 70% power, stirring ever minute until smooth. Cool slightly, 2 to 5 minutes.
  5. In clean bowl of stand mixer fitted with whisk attachment, whip cream, granulated sugar, and salt at medium speed until mixture begins to thicken, about 30 seconds. Increase speed to high and whip until soft peaks form when whisk is lifted, 15 to 60 seconds.
  6. Whisk cocoa powder mixture into melted chocolate until smooth. Using whisk, fold one-third of whipped cream into chocolate mixture to lighten. Using rubber spatula, fold in remaining whipped cream until no white streaks remain. Spoon mousse into springform pan over cooled cake and gently tap pan on counter 3 times to remove any large air bubbles; gently smooth top with offset spatula. Wipe inside edge of pan with damp cloth to remove any drips. Refrigerate cake at least 15 minutes while preparing top layer.
  7. FOR THE TOP LAYER: In small bowl, sprinkle gelatin over water; let stand at least 5 minutes. Place white chocolate in medium bowl. Bring ½ cup cream to simmer in small saucepan over medium-high heat. Remove from heat; add gelatin mixture and stir until fully dissolved. Pour cream mixture over white chocolate and whisk until chocolate is melted and mixture is smooth, about 30 seconds. Cool to room temperature, stirring occasionally, 5 to 8 minutes (mixture will thicken slightly).
  8. In clean bowl of stand mixer fitted with whisk attachment, whip remaining cup cream at medium speed until it begins to thicken, about 30 seconds. Increase speed to high and whip until soft peaks form when whisk is lifted, 15 to 60 seconds. Using whisk, fold one-third of whipped cream into white chocolate mixture to lighten. Using rubber spatula, fold remaining whipped cream into white chocolate mixture until no white streaks remain. Spoon white chocolate mousse into pan over middle layer. Smooth top with offset spatula. Return cake to refrigerator and chill until set, at least 2½ hours.

  9. TO SERVE: Garnish top of cake with chocolate curls or dust with cocoa. Run thin knife between cake and side of springform pan; remove side of pan. Run cleaned knife along outside of cake to smooth sides. Cut into slices and serve.
 

Related Posts Plugin for WordPress, Blogger...