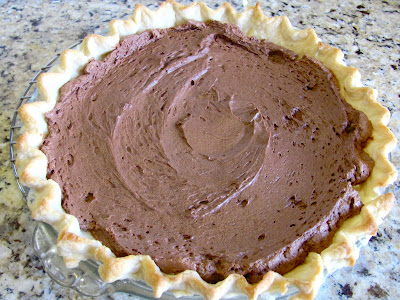

This pie is dangerously delicious! If you are afraid of calories, run & hide! I admit when it comes to rich, chocolatey dessert calories, I have NO FEAR! French silk is my daughter's favorite celebrate pie. I made it today to celebrate her AWESOME report card for the 1st quarter of 11th grade!
If you haven't tried french silk pie, it's not like a regular chocolate cream pie. It's more like chocolate mousse in a pastry crust. I got the recipe from my 1986 Betty Crocker cookbook. So it's definitely a classic! It's no bake, except for the crust & it's as easy as...PIE! Notice the recipe only has TWO steps! Feel free to use a store bought refrigerated pie crust & Cool Whip, if you like.
 Classic French Silk Pie
9 inch Baked Pie Crust-see recipe HERE
1 cup granulated sugar
3/4 cup butter, softened (not margarine)
1 1/2 teaspoons vanilla
1/4 teaspoon cream of tartar
3 squares (1 ounce each) unsweetened chocolate, melted and cooled (I chop it up & melt it in the microwave with low heat)
3 eggs
1. Beat granulated sugar and butter in 1 1/2 quart bowl until light and fluffy. Stir in vanilla, cream of tartar and chocolate.
2. Beat in eggs until light and fluffy, about 3 minutes. Pour into baked pie shell. Refrigerate until set, 3 to 4 hours. Or cover with plastic wrap and freeze at least 8 hours. We like it frozen!
 P.S. If pie is frozen, remove from freezer 15 minutes before serving.
Top pie with whipped cream & chocolate curls, if desired, . Refrigerate any remain pie.

Whipped Cream
ingredients
1 cup chilled whipping cream
3 tablespoons powdered sugar
1 teaspoon vanilla
directions
1. Beat whipping cream in a chilled 1 1/2 quart glass or metal bowl until it begins to thicken. Add powdered sugar & vanilla & beat until soft peaks form. Store in refrigerator.
P.S. Whipped cream does not hold up well like Cool Whip does, unless it has been stabilized. Do not put this whipped cream on the pie until you are ready to serve it. The whipped cream can be stored separately in a sealed bowl in the refrigerator for a day & then it will begin to begin to fall.
Chocolate Curls
1. Melt 1/2 cup chocolate chips with 1 teaspoon shortening. Pout onto the bottom of a NON-COATED metal cookie sheet.
 2. Let the chocolate set up or pop the pan it in the fridge for a few minutes to harden. Use a blunt metal spatula, holding it at a 45 degree angle from the chocolate, scrap the chocolate off the pan into curls. If curls break, chocolate is too cold, let it sit at room temp for a few minutes. If chocolate doesn't curl, it's too warm, back in the fridge. Use a toothpick to pick up & move the curls.
This looks delicious and beautiful! I've always thought chocolate curls would be complicated, but you make it look easy. I think I'll give them a try!
ReplyDeleteThis looks amazing! And the trick for chocolate curls is GENIUS!
ReplyDelete