Friday, December 7, 2012

peppermint bark snowflakes party!


 It's Christmas time & we all need quick tips for homemade holiday goodies and gifts that are simple yet impressive. This one hits all the marks.
 The hardest part of these no bake treats is tying the bows for the packaging. And who doesn't love the Christmas classic of peppermint bark with milk chocolate, white chocolate & CANDY CANES?!
 These would be great little treats for teachers, neighbors and friends. You could also tie one onto a package or add a few to your Christmas cookie platters.

I bought my silicone molds at etsy.com last year. The person I bought them from is no longer on etsy but THIS is the exact same mold. I bought an extra one & I'M SHARING! See giveaway below!

To crush the candy canes I placed them in a ziploc bag and smashed them with the handle of a big knife. Then I sifted out the candy cane dust & gave the big pieces another whack. I sprinkled each snowflake with some bigger pieces & some candy cane dust.
 Be careful with the peppermint oil, mine is VERY strong & you don't want to over do it! I bought mine at Baker's C&C, which is a local cake decorating store, but it may be available at a grocery store. Add ONE drop at a time & taste test before adding another drop.

Peppermint Bark Snowflakes
inspired by Baked By Rachel's 2010 blog post
 makes 6 peppermint snowflakes

1 cup milk chocolate chips
1 cup chopped Candiquik Vanilla Candy Coating
6-8 drops peppermint OIL (not extract)
6-8 mini candy canes, crushed

1. Melt milk chocolate chips. I use a small plastic bowl in the microwave.  On medium power, cook for 1 minute & stir, repeat at 30 second intervals until melted and smooth. Stir in 3-4 drops of peppermint oil, to taste.

2. Spoon melted milk chocolate into each mold to completely cover the bottom, 2-4 teaspoons, depending on how thick you want your bark. If needed, use the tip of a knife to spread it around a bit to make sure all of the edges & corners are covered with chocolate. Allow chocolate to set. You can move the mold on a cookie sheet into the refrigerator for 5-10 minutes to speed up the process.

4. Melt white candy coating in a plastic bowl in the microwave. On medium power, cook for 1 minutes & stir. Repeat at 30 second intervals until melted & smooth. Stir in 3-4 drops of peppermint oil, to taste.

5. Spoon 2-4 teaspoons melted candy coating into each mold over the set milk chocolate. Immediately sprinkle with crushed candy canes. Allow chocolate to set. You can move it to the refrigerator to speed up the process.

6. Remove the snowflakes from the silicone mold. They come out very easy by bending the silicone mold and peeling it away from the peppermint snowflake.
 7. Wrap them up in cellophane bags, tie with a ribbon & give them to your favorite people!

 P.S. be careful melting chocolate & candy coating in the microwave. If you over cook it you'll have to toss it & start over.

**GIVEAWAY IS CLOSED**

To celebrate CHRISTMAS, SNOWFLAKES & PEPPERMINT I'm giving away a silicone snowflake mold and a 16 ounce package of Vanilla Candiquik to one lucky winner. Giveaway closes Wednesday, December 12!

To enter all you need to do is STEP 1. "Like" Sprinkle Some Sunshine on FACEBOOK AND STEP 2. Come back to this blog post and leave a comment telling me what your favorite HOLIDAY TREAT is. If you already like Sprinkle Some Sunshine on FB then just leave your holiday treat comment here! To leave a comment click below where it says "1 comment" (or whatever number ) & a comment box will pop up. A random winner will be selected and notified 12/12/12.

Tuesday, October 30, 2012

pumpkin shaped bread bowls and witch finger bread sticks party!

Today I made a quick batch of my FRENCH BREAD ROLLS, added some food coloring and came up with some pumpkin shaped bread bowls & witch finger bread sticks. They were delicious served with a caldron of witch's brew (cheesy cream of broccoli soup). My ghosts and goblins were in Halloween heaven!
 The only change in the original recipe is to add food coloring after step number two. I used gel food coloring & mixed red and yellow to make orange. Liquid food coloring would work great too. After step number two, I divided the dough and colored 3/4 of the dough orange and 1/4 of the dough green in separate bowls. Then continue on with the original recipe at step three for kneading, rising, etc.
Shape rolls as desired. The recipe made 4 pumpkin shaped bread bowls and 8 bread sticks. I also baked some dough around a wooden spoon to have vines for the pumpkins. The bread bowls were slightly smaller than my usual bread bowls since I used a lot of the bread dough for the green. The pumpkin stems take very little green dough. For the witch fingers I used sliced almonds for fingernails & brushed a little red food coloring on them for blood.

Bake the bread sticks for about 10 minutes at 400 degrees until slightly browned on the bottom & the bread bowls for about 15-17 minutes. If you make the vine wrapped around the wooden spoon, brush some oil on the wooden dowel before you wrap the dough around it and bake for about 5 minutes. Prop the ends of the spoon onto the edges of the pan so the dough is not touching the pan. After baking and cooling, carefully wrap your hand around the dowel/vines & wiggle until the bread becomes loose, then slide the vine off the stick and break it into spiral pieces. 


Monday, October 22, 2012

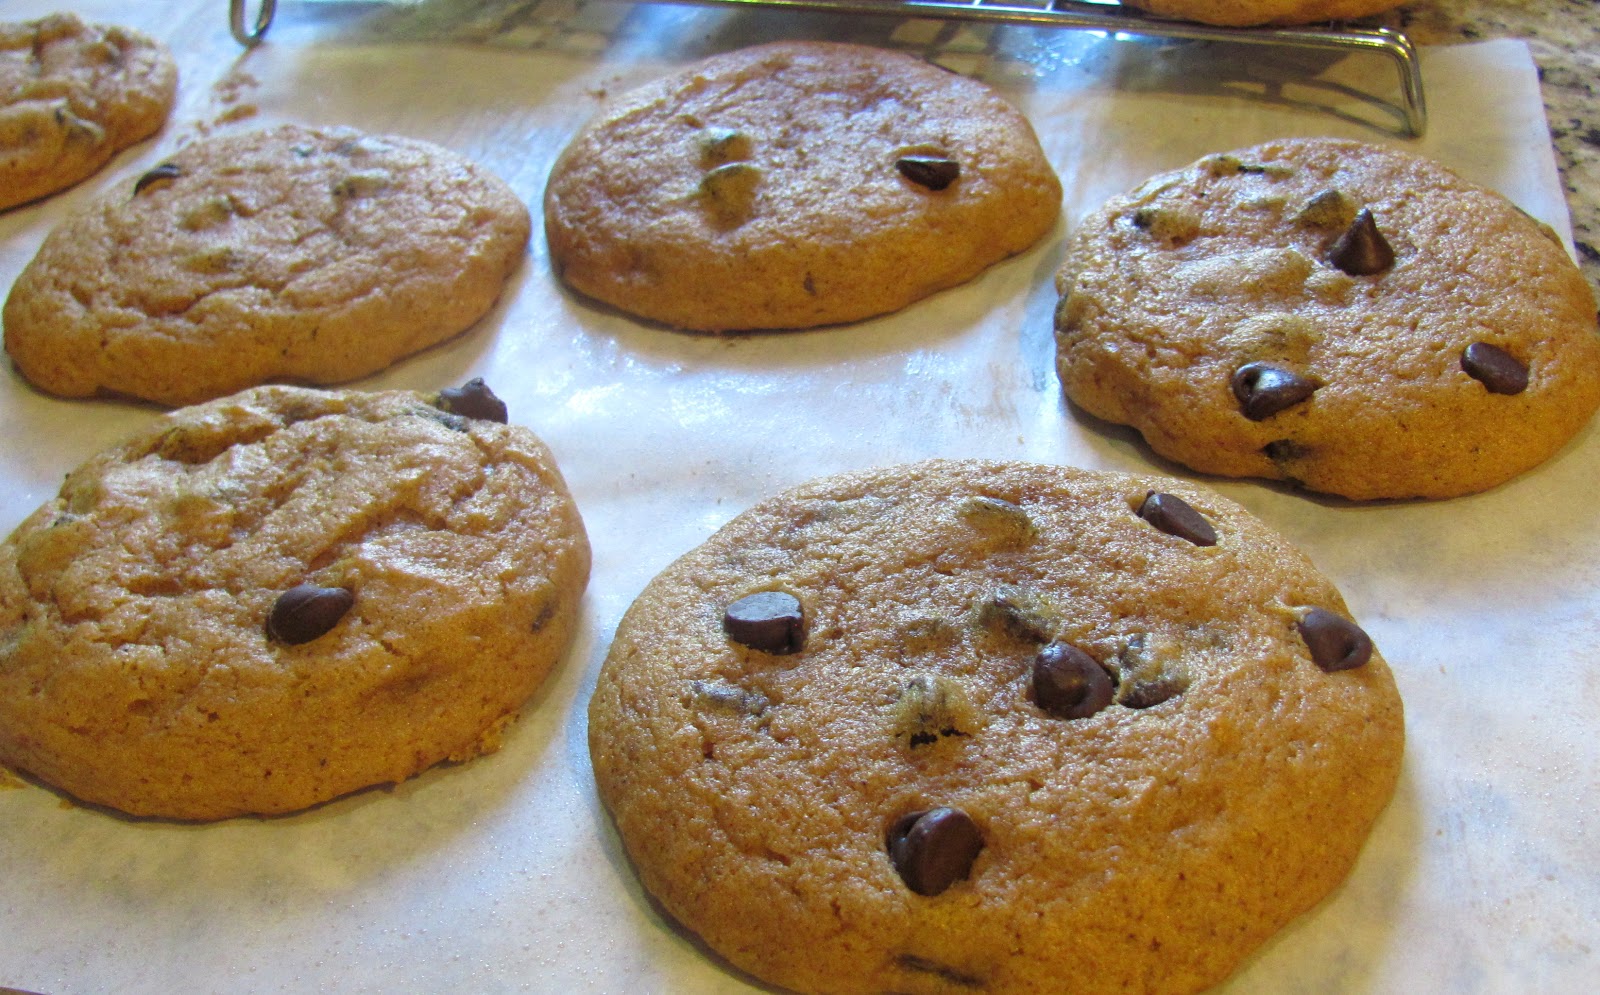
pumpkin chocolate chip cookies party!


If you like my pumpkin chocolate chip muffins you MUST try these cookies! This one is the recipe jackpot for pumpkin lovers!

The recipe is from Cutler's Cookies, a much loved sandwich shop & bakery in Utah. When I worked downtown Salt Lake City, Cutler's was my favorite place to eat lunch. 1/2 a turkey avocado sandwich on their homemade honey wheat bread & one of their famously SOFT cookies was such a treat! Cutler's very generously shared their recipe with A Bountiful Kitchen & Si shared it on her blog. Thanks to both of you! Cutler's moved their downtown location to Davis County so if you are ever in Bountiful, Centerville or Layton, UT stop by Cutler's, you'll be SO glad you did! I also love their chicken salad sandwich with cashews and sprouts!
Here is the secret to Cutler's SUPER SOFT cookies: They always use CAKE FLOUR. It has less gluten and less protein and creates a lighter texture than all-purpose flour.
Cake flour is sold in a box & can be found by the cake mixes or the baking supplies in your grocery store. I was skeptical that it would make a difference but wow, these cookies are so soft & light & yummy! I'm sure these would be great with all-purpose flour too but try cake flour if you can.
Cutler's Pumpkin Chocolate Chip Cookies
recipe from A Bountiful Kitchen

makes 36 large cookies-recipe can easily be halved

1 cup softened butter
3 cups granulated sugar
2 eggs
2 cups pumpkin
2 teaspoons vanilla
2 teaspoons cinnamon
1 teaspoon nutmeg
1/2 teaspoon ground cloves
5 cups CAKE flour
1 teaspoon salt
2 teaspoons baking powder
2 teaspoons baking soda
2 cup chocolate chips

1. Preheat oven to 375 degrees.

2. Using an electric mixer, beat butter and sugar together for about 2 minutes or until smooth. Add eggs, pumpkin, vanilla and spices. Continue beating for an 2 additional minutes.

3. Add flour, salt, baking powder and baking soda to the bowl & mix just until flour disappears and all ingredients are combined. Stir in chocolate chips.
4. Using a large cookie or ice cream scoop (mine holds 1/4 cup) place dough onto parchment lined baking sheets or lightly greased cookie sheets. These are large cookies. I only fit 6 cookies at a time on my cookie sheets 
 5. Bake at 375 degrees for 10-12 minutes. Let cool completely on baking sheet before transferring to cooling rack.
P.S. The original recipe says to bake at 350 degrees but I needed to raise it to 375.


Saturday, September 29, 2012

no-bake oatmeal cookies and cookbook talk party!

 
As much as I love the thousands of food blogs & online recipe sights, there is nothing like cracking open a new AMAZINGLY written, published & printed cookbook! I'm a cookbook junkie! I love to read them like novels, cover to cover. I also love my local library. They have a great selection of cookbooks, almost always have the newest releases & anything on the best sellers lists. I almost always have a cookbook on hold at the library & I currently have 4 cookbooks checked out, 1 overdue.

Baked Explorations by Matt Lewis & Renato Poliafito is one of my current favorites! The subtitle is "Classic American Desserts Reinvented", which is right up my alley. I LOVE Classic Desserts! What's more classic than peanut butter, chocolate & oats?
When I begin reading a new cookbook I get a piece of paper to use as a bookmark. As I read the book, I write down the recipes that I want to make. I gathered a long list from this book, which explains why it is past due.
The first recipe I made from this book is the classic No-Bake Oatmeal Cookies, page 185. I grew up on these & often came home from school to find a batch of them on the kitchen counter. My mom is THE expert on these sweet treats!

No-Bake Oatmeal Cookies
makes 48 cookies (recipe can be halved)

ingredients

1/2 cup whole milk (I used 1%)
2 cups sugar
1/4 cup unsweetened cocoa powder
1/2 cup (1 stick) butter, softened
1 cup peanut butter (smooth or crunchy)
3 cups old fashioned oats
1 teaspoon pure vanilla extract

directions

1. Line counter top area with waxed paper or parchment paper.

2. Cut the softened butter into 1/2 inch cubes.
3. In a heavy saucepan over medium heat, stir together the milk, sugar, cocoa & butter until the butter is melted and the sugar is dissolved.

4. Bring mixture to a boil, stop stirring, and boil for a full 90 seconds. Don't overcook or cookies will be overly dry & crumbly.
 5. Remove from heat and add the peanut butter, oats & vanilla. Quickly stir until the mixture is combined.
6. Use a small scoop or a tablespoon to drop the no-bake cookies on to the waxed paper.  If you do this very quickly the cookies will spread a bit on the wax paper while the mixture is still hot, which most people prefer. I took my time, snapping a picture, so my cookies didn't spread since they set up very quickly. Allow to cool. Can be stored in tightly sealed container for 3 days.
 P.S. My mom sometimes did this & so do I: Make the exact recipe MINUS the cocoa powder for a yummy No-Bake PEANUT BUTTER cookie treat!
 Next on the list is this GORGEOUS Mississippi Mud Pie, page 156.


Monday, September 17, 2012

creamy chicken enchiladas party!


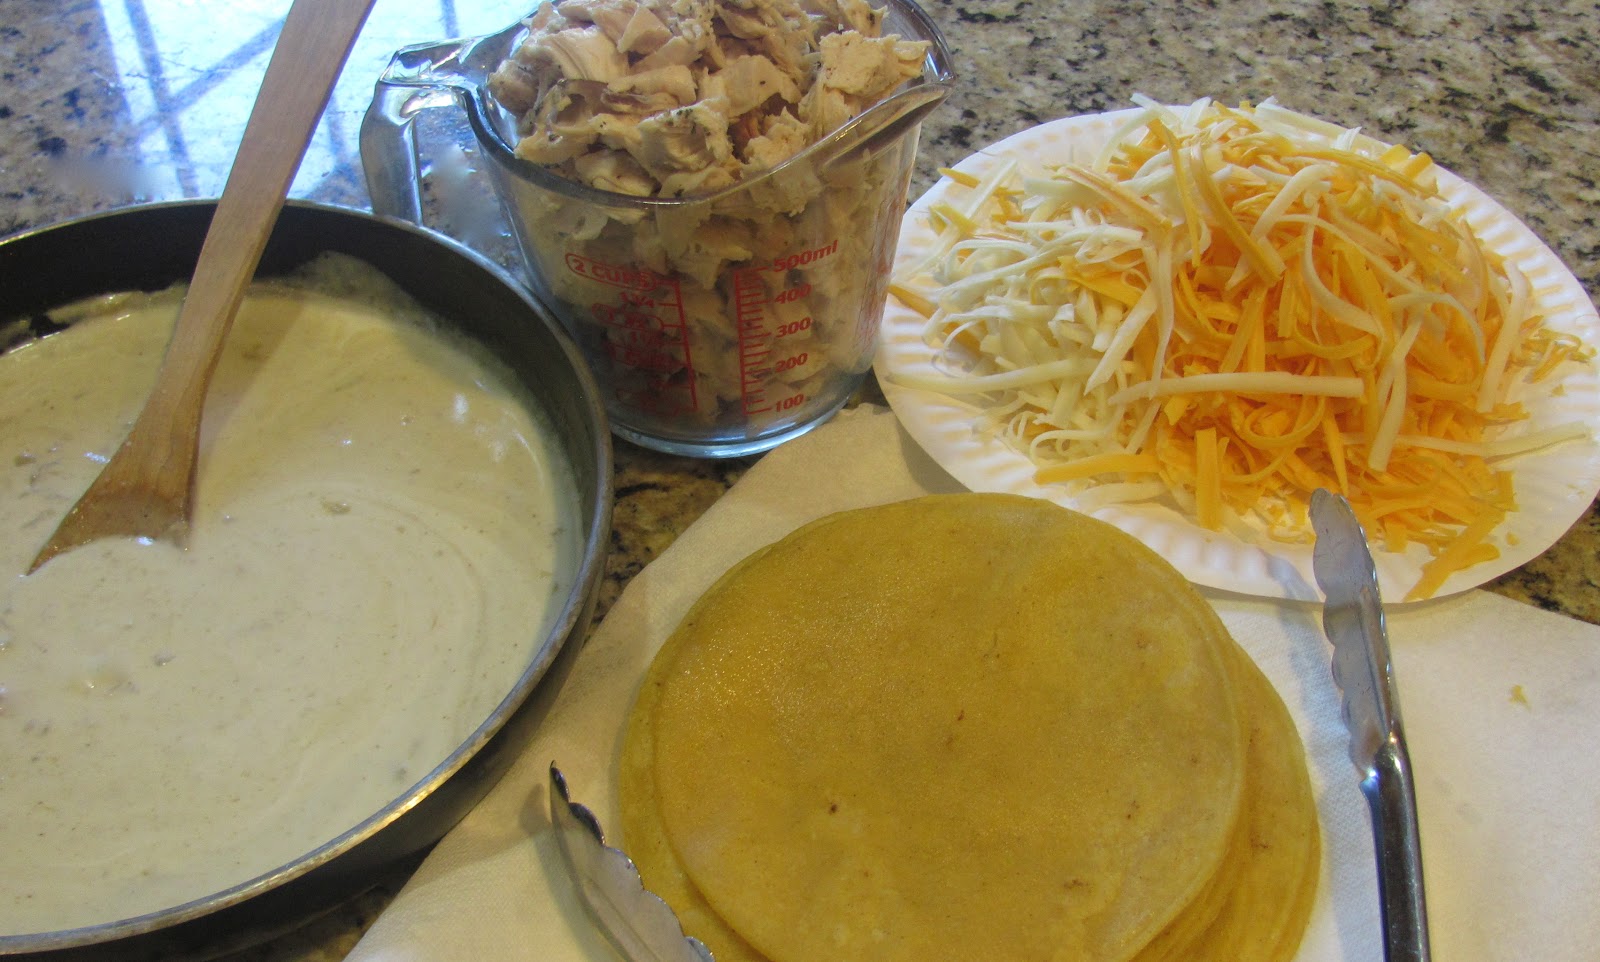
Mexican food is my very favorite. I love it ALL, authentic or Americanized. This recipe isn't authentic Mexican but for a small town Midwestern girl who's favorite treat growing up was going to the big city & eating at Taco Bell, anything made with tortillas equals Mexican food. These enchiladas are mild and delicious, creamy, cheesy comfort food with Mexican flavors and flair. They come together quickly if you have roasted chicken in the freezer like THIS recipe

At a Mexican restaurant I almost always order a ground beef taco & a cheese enchilada with rice and beans. YUM! But I could also make a meal out of chips & salsa. I want to eat Mexican food everyday! This is one of my favorite at-home Mexican meals!
Creamy Chicken Enchiladas
adapted from www.allrecipes.com

ingredients

2 tablespoons butter
1/2 an onion, chopped
2 tablespoons flour
14.5 ounce can or 1 1/2 cups chicken broth
2  4 oz. cans of chopped green chiles or you can use 1 cup of fresh roasted Anaheim peppers
1 clove garlic, minced
3/4 teaspoon salt
1 teaspoon ground cumin
 12 (8 inch) corn tortillas
1/4  cup vegetable or canola oil for frying
1 cup shredded Monterey Jack cheese, or more
1 cup shredded mild Cheddar cheese, or more
2 cups roasted or cooked chicken, shredded
1/2 pint heavy cream

directions

1. Melt butter in saucepan over medium heat. Saute the onion for a few minutes until soft. Stir in the flour. Add the broth, chiles, garlic, salt, and cumin. Simmer about 15 minutes to blend flavors. Remove from heat & stir in the cream. Set aside.

 2. In a small heavy skillet, heat the oil on medium heat & lightly fry tortillas one at a time, only for 5-10 seconds per side. I only add half the oil, fry 6 tortillas then add the other half of the oil & fry the rest. That way the first ones are overly oily with no oil at the end. You just want them to soften. If they crisp you won't be able to roll the enchiladas. Place tortillas on a paper towel lined plate as you fry each one.

3. Preheat oven to 350 degrees F (175 degrees C.) 

4.  Combine the cheeses and keep 1/2 cup aside for topping. 
5. Assemble enchiladas one at a time by dipping a tortilla in the green chili sauce (both sides). Place 2 heaping tablespoons chicken and 2 tablespoons cheese down the center of each; roll and place seam side down in a shallow dish. I prefer to use a large cookie sheet because I don't like my enchiladas to touch each other. If you put them in a 9x13 pan they seem to squish together and make more of a casserole where you can't really separate 1 enchilada from another.

6. After all the rolled tortillas are on the pan, spoon the additional green chili sauce over them. Sprinkle with remaining 1/2 cup cheese mixture.
7. Bake uncovered in preheated oven for 20 minutes. Garnish with chopped green onions, black olives, chopped tomatoes, sour cream, guacamole and salsa.


Saturday, September 8, 2012

garlic parmesan ranch dressing & homemade croutons party!


I'm super excited to be participating in the Crazy Cooking Challenge for the first time. The CRAZY COOKING CHALLENGE is a monthly themed blog hop, where a bunch of fellow bloggers all make the same type of recipe and we all post on the SAME day each month. The group is in it's second year and I'm thrilled to have been invited to join! 

The theme for this month is HOMEMADE RANCH SALAD DRESSING/DIP. You can see all of the recipes below from the CCC group.

Who doesn't love a fresh crisp salad, especially with homemade dressing. I took it one step further and also made homemade croutons. Without further adieu, I give you my version of homemade Garlic Parmesan Ranch Salad Dressing and matching Croutons!

Garlic Parmesan Ranch Salad Dressing

1 cup mayonnaise
1/2 cup sour cream
1/2 cup buttermilk, more or less depending on desired thickness
2 tablespoons dried basil
1 teaspoon dill
2 cloves garlic, minced
2-3 tablespoons grated Parmesan cheese
1/2 teaspoon salt or to taste
1 teaspoon freshly ground pepper

1. Whisk together all ingredients. Cover & refrigerate at least 1 hour or overnight. If you would like to make a thicker DIP for chips or veggies, omit mayonnaise & substitute sour cream. 

Homemade Croutons
Recipe adapted from the Food Network

For the croutons I bought a loaf of the grocery store bakery GARLIC french bread because it was CHEAP. You know the one that is cut in half with garlic butter spread on it? I never buy that stuff but I needed day old bread & that's all they had. It's good! I bought it from the "day old" shelf so it was half price, $1.25 per loaf. We immediately ate half the loaf then saved the other half for the croutons the next day. So my day-old bread was actually 2 days old.

* I separated the top from the bottom & used a butter knife to scrape the garlic butter off the bread so I could more evenly distribute it with the other seasonings. Then I stirred that excess garlic butter in to the recipe below. The croutons had a LOT of flavor & definitely a double dose of garlic. If you don't have the store bought garlic bread just make the croutons with plain french bread & the seasonings below. They will still be very delicious! The original recipe did not call for the garlic buttered french bread. 
Taste one of the croutons before you bake them & if you want more flavor, add more salt, garlic & olive oil.


ingredients:

1/2 a loaf of "day old" french bread or garlic bread
1/2 teaspoon salt
1/4 teaspoon cayenne pepper
1/2 teaspoon paprika
2 teaspoons dried parsley
1 teaspoon dried basil
2 garlic cloves, minced
2 tablespoons grated Parmesan cheese
1/3 cup extra virgin olive oil

* Plus the excess garlic butter removed from the 1/2 a loaf of bread, if garlic bread is used. It's in the yellow bowl in the pic above.

directions:

1. Reheat oven to 325 degrees. 

2. Whisk together all ingredients except bread.

3. If you are using store bought GARLIC bread, scrape off the excess garlic butter & whisk it into the oil and seasoning mixture.

4. Cut bread into 3/4 inch cubes. You'll have about 4-6 cups of bread cubes.

5. Place bread cubes on a large baking sheet. Drizzle oil & seasoning mixture over bread cubes. Mix well with your hands or a spatula, tossing to evenly distribute the seasoning.

6. Bake at 325 degrees for 20-30 minutes or until crisp and slightly browned.

6. Allow to cook & store in airtight container.

Perfect croutons for salad or soup.


Related Posts Plugin for WordPress, Blogger...