Wednesday, July 3, 2013

lemon blueberry muffin pound cake

I truly, madly, deeply LOVE summer and what says summer more than juicy blueberries and lemon
This quick bread/cake is really bursting with sweet blueberries. The lemon zest and lemon juice provides a subtle lemon taste but it definitely brings out the fresh flavor of the blueberries. This recipe is scrumptious! If you love blueberries you will love it too!

Lemon Blueberry Muffin Pound Cake
inspired by: PBS.org
ingredients

2 cups all purpose flour
1 ½ tsp baking powder
½ tsp salt
1 stick (1/2 cup) unsalted butter, room temperature
1 cup sugar
2 eggs
2 cups blueberries
zest from 1 lemon, or to taste
½ cup vanilla yogurt
1 tablespoon fresh lemon juice

For Glaze:
       1 cup powdered sugar
       1  tablespoon fresh lemon juice

directions

1.    Preheat oven to 350 degrees.

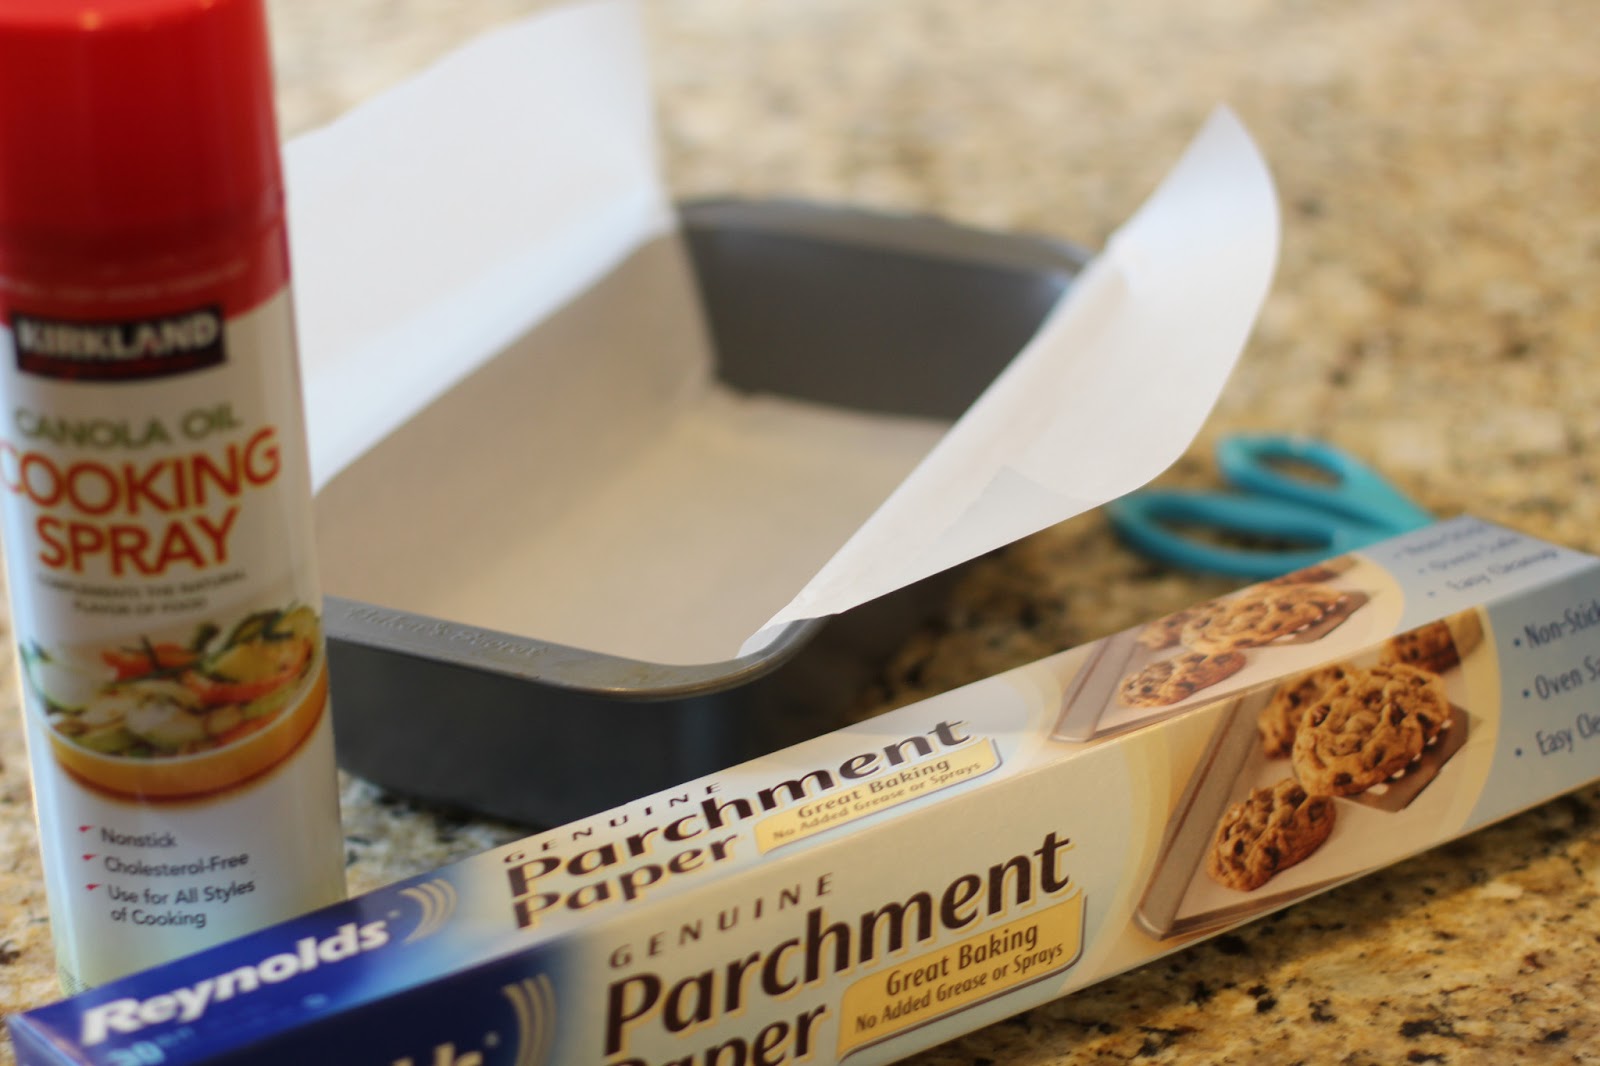
2.    Spray a loaf pan with nonstick cooking spray AND line the pan with parchment paper AND spray the parchment paper. Set pan aside. Sometimes blueberries stick to the pan so don’t skip the parchment paper, if at all possible. Trust me. The narrow sides of the pan are not lined with parchment paper & it's fine with just the spray in that area.

3.    In a medium bowl, whisk together flour, baking powder, salt and lemon zest. Add the blueberries and carefully toss to combine.

4.    In a separate mixing bowl, cream together the butter and sugar until light and fluffy. Add eggs, one at a time, beating well after each addition. Mix in the yogurt. Stir in the dry ingredients, mixing only until incorporated and being careful not to crush the blueberries.

5.    Scoop batter into the prepared loaf pan and bake for 1 hour 10 minutes, until golden brown. If it browns on top too quickly just set a piece of aluminum foil over the top for the last 10 minutes or so. I need the full 1 hour and 10 minutes for it to cook through. Let cool in the pan for 10 minutes before lifting out by parchment paper or inverting gently onto a plate.
 6.    Stir powdered sugar and lemon juice together and drizzle over cooled bread.

Monday, June 24, 2013

cheesy bacon potato bites party!


 Click HERE to join me on Facebook for the latest updates and new recipes!

Click HERE to print recipe only

Your lips with thank you, your hips will curse you! I admit, making this recipe last night put me over the edge & I started a diet today, but they are SO worth it! These are definitely a splurge if you are trying to eat healthy.

The combination of potatoes, cheese and BACON equals AMAZING comfort food for a special treat. I served them for dinner with turkey burgers but they would also be great for a bunch.
  
Cheesy Bacon Potato Bites
adapted from Vittles and Bits

ingredients

2 lbs. potatoes, I used 3 large potatoes
6 slices of bacon, cooked, drained & chopped (reserve 1 tablespoon of the bacon grease).
2 cups medium cheddar cheese, shredded
4 green onions, chopped
salt & pepper to taste

directions

1.      Preheat oven to 375 degrees. Brush cookie sheet very lightly with reserved bacon grease. OR you could spray it with cooking spray to save a few calories.

2.     Wash & slice potatoes, somewhere between 1/4 and 1/8 inch thick. I like them best on the thick side.
3.     Place potato slices in a large pot, cover with water & cook until water boils. Boil for about 5 minutes or less, depending on the thickness of your potatoes. You DON'T want them cooked through, and you definitely still want them firm or they will fall apart.

4.     Carefully drain potatoes and arrange on prepared cookie sheet, shingle style, slightly overlapping. Lightly brush potatoes with reserved bacon grease. Or if you are anti-bacon grease, brush with vegetable oil or olive oil.
 5.     Sprinkle with shredded cheese, salt and pepper to taste and chopped bacon.


6.     Bake for 15 minutes until potatoes are cooked through. I placed it under the broiler for 2 minutes after baking for a little extra crunch. 

7.     Top with chopped green onions.

Tuesday, January 22, 2013

carrot cake with cream cheese frosting party!

 
Don't you just love a LAYER CAKE, especially on a pretty pedestal cake plate? Anytime I walk into a bakery I'm immediately drawn to them. They just seem to equal a party to me with their multiple layers of delicious cake stacked with double or triple the frosting! Don't wait for a party; make today a special occasion with this carrot cake!
It is definitely ooooh & ahhhh worthy and is on point for a classic carrot cake. I've had many carrot cakes in my day and this is the ONE! Some carrot cake recipes call for pineapple, coconut or raisins, which you can add if you want. I'm a old-fashioned, simple girl and like mine chock full of fresh grated carrots, spiced with cinnamon, frosted with silky smooth, melt in your mouth, cream cheese frosting and garnished with toasted chopped nuts.

I got the recipe from one of my clients. She brought me a giant piece of this cake to share with Mark & I was in HEAVEN! Mark & I are both thankful that she shared the recipe with me because I didn't get home with his half. The original recipe is from Joy of Cooking and she made some minor changes which I followed exactly.

Carrot Cake

ingredients:

3/4 pound (about 2 1/2 cups) peeled & finely grated carrots
2 cups all purpose flour
1 teaspoon baking soda
1 1/2 teaspoons baking powder
1/2 teaspoon salt
1 1/2 tablespoons ground cinnamon
4 large eggs
1 1/2 cups granulated sugar
1 cup safflower, vegetable or canola oil
2 teaspoons pure vanilla extract

directions:

1. Preheat oven to 350 degrees. Grease and flour two 8 or 9 inch cake pans and line the bottoms of the pans with a circle of parchment paper. I used 9 inch cake pans today but decided I prefer 8" so the cake will be a little taller.

2. Peel and finely grate the carrots. Set aside.
3. In a separate bowl whisk together the flour, baking soda, baking powder, salt & ground cinnamon. Set aside.

4. With an electric mixer, beat the eggs until frothy (about 1 minute). Gradually add the sugar and beat until the batter is thick and light colored (3-4 minutes). Add the oil slowly in a steady stream while mixing and then beat in the vanilla extract.

5. Add the flour mixture and beat just until incorporated.

6. With a large rubber spatula fold in the grated carrots.

7. Evenly divide the batter between the two prepared pans and bake 25 to 30 minutes or until a toothpick inserted in the center comes out clean.

8. Remove from oven and let cool on a wire rack. After 5-10 minutes invert the cakes onto the wire rack, remove the pans and parchment paper and cool completely.

9. Make frosting & roasted nuts below.

10. Place one cake layer onto your serving plate. Spread with 3/4 cup frosting. Place the 2nd cake onto the frosting and spread the rest of the frosting over the top and sides of the cake. If desired, garnish with toasted nuts. Cover and refrigerate until ready to serve.
 Cream Cheese Frosting

1/2 cup butter. at room temperature
8 ounces cream cheese, at room temperature
3 to 3 1/2 cups powdered confectioners sugar
1 teaspoon pure vanilla extract

With electric mixer, beat the cream cheese and butter on low speed until blended with no lumps. Gradually add the sifted powered sugar and beat until fully incorporated and smooth. Beat in the vanilla extract. You want the frosting to be soft and smooth. If it's too stiff it will not go on the cake smoothly. You can adjust the amount of powdered sugar a bit or add a teaspoon or 2 of milk if you need to adjust the consistency of the frosting.

I also garnished the side of the cake with toasted, chopped almonds. Toasted pecans or walnuts would also be delicious.

Toasted Almonds

Preheat oven to 350 degrees. Place 1 cup of raw whole almonds in an ungreased pan. Bake for 5 minutes, stir nuts and bake for another 3-5 minutes. I chopped the nuts with a large knife because I wanted them on the chunky side & my food processor chops nuts too finely for what I wanted on this cake. You could also use a food chopper or just buy your nuts already chopped.
Immediately after frosting cake, before the frosting crusts, place some nuts in your hand and press them into the side of the cake over a large piece of wax paper. Allow excess nuts to fall onto wax paper, turn cake and repeat until all sides are covered.




Thursday, December 20, 2012

microwave peanut brittle party!


Click HERE to print recipe only

I have so much fun volunteering at the Festival of Trees every year. The festival is a HUGE fundraising event benefiting Primary Children’s Medical Center.  The attractions include over 700 elaborately decorated Christmas Trees, Aisle of Wreaths, Sweet Shoppe, Gingerbread Village, Quilt Block, Playhouse Plaza, Gift Boutique, Santa Land & TONS of non-stop entertainment by local musicians, dance groups, choirs, etc. It’s a four-day Christmas party & I look forward to it every year!
I love being on the SWEET SHOPPE committee and this was my 3rd year. At the SWEET SHOPPE we sell handmade fudge, pecan rolls, chocolates, divinity, caramel apples, baked goods, toffee, truffles, brittles, popcorn balls, cotton candy, ice cream cones and every other holiday confection you can think of. Whether I’m elbow deep in the cotton candy machine or handing an ice cream cone to a child, serving at the Festival of Trees is MAGICAL!
This year besides working at the festival I helped my committee make 50 pounds of peanut brittle to sell! We were up all night mixing, stirring, breaking, weighing, packaging & labeling. The peanut brittle was DIVINE!  You probably know that I’m a failure with a candy thermometer. This recipe calls for one but you can make it without and IT’S MADE IN THE MICROWAVE. Here is a picture of the new (instant read) candy thermometer I bought & it's NOT instant read & it never got above 275 degrees with this recipe. I took it back & made many more batches of this peanut brittle without a candy thermometer at all.

The recipe is written for a 900 watt microwave. If you look inside your microwave there is probably a label that says what your microwaves wattage is. Mine is 1,000 watts so I decreased the cooking time just a bit but I don’t think it was necessary. 

I used raw Spanish peanuts because I love the flavor. I wouldn't use salted roasted peanuts. You could use raw pecans or walnuts instead.
I suggest that you have all of your ingredients measured out before you start because you need to do this quickly so it doesn’t lose it’s heat between steps. Also have several spoons ready so you can use a clean spoon every time you need to stir. 
It’s SO easy and delicious, sweet, buttery and crunchy. I have no idea where this recipe came from but it’s THE BEST! Ready, set, go!

 Peanut Brittle


2 cups sugar
1 cup white Karo syrup
2 dashes of salt
2 cups shelled raw peanuts (Pecans, Walnuts, etc.)
2 tablespoons butter
1 tablespoon baking soda
2 tsp. vanilla

1. Line a large cookie sheet with aluminum foil & butter it really well. Aluminum foil is optional but makes clean up very easy & also helps you lift the hardened brittle from the pan. 

 2. In a heavy glass bowl stir together the sugar, corn syrup and salt. It is much easier to work with if you use a bowl with a handle. I use my Pampered Chef 2 quart measuring bowl with handle. Microwave for 4 minutes. Since my microwave is 1000 watts I cooked it for 3 minutes 45 seconds but I don't think it matters.

 3. Stir in the peanuts and microwave for 2 more minutes. 

4. Stir in the butter and vanilla and microwave 7 more minutes (or until tan in color and an instant-read thermometer registers 300 degress.)  Since my microwave is 1,000 watts I cooked it for 6 minutes 45 seconds but I don't think it matters. My "instant read" thermometer never got above 275 degrees (see note about being a candy thermometer failure above) & it still worked perfectly using the cooking times instead of the thermometer readings.
5. QUICKLY stir in baking soda. Mixture will puff up. QUICKLY pour onto the prepared pan & QUICKLY spread it out thinly with a buttered spoon. Let cool.


 6. Break into pieces & enjoy! Stays very fresh for a least a couple of weeks in a sealed container. 

Tuesday, December 11, 2012

sugar spiced pecans party!

 
These spiced pecans give me a flashback to 1987, living in Indiana & working at Columbus Bank & Trust. We had a certain daily customer, stiletto high heeled, platinum Barbie haired, short skirted (mostly leopard print), gorgeous, construction business owner, probably in her late 50’s who brought us a pound of spiced pecans every Christmas & we devoured them like a pack of hungry wolves.
The main reason I hated quitting that job was those spiced pecans. I worked there for 4 years & begged her every year for the recipe & she refused to share it.  From time to time I’d find a recipe for spiced pecans & try it & it was never the same as hers. In fact, a few years ago I tracked her down & let her know that I moved 1,500 miles away, 20 years had passed & Columbus Bank & Trust doesn’t even exist anymore. I asked her again if she’d share her recipe with me & I swore on the Bible that I wouldn’t share it with a living soul. The answer was still NO. Can you believe that? Well guess what, sexy lady? I cracked the code to your spiced pecans & the recipe couldn’t be easier!

If you make these for someone I can pretty much GUARANTEE that they will NEVER forget you! They will be talking about you on the world wide web 25 years from now. This is proof! What are you waiting for? Go make someone’s day…namely YOURS!
Sugar Spiced Pecans
adapted from www.allrecipes.com

1 pound pecan halves
1 egg white
2 teaspoons water
1 teaspoon vanilla extract
1 cup granulated sugar
½ teaspoon salt
1 teaspoon ground cinnamon

1. Preheat oven to 250 degrees. Spray baking sheet with non-stick spray.

2. In a large mixing bowl, whisk the egg white, water & vanilla together until frothy, with a fork.

 3. In a separate large mixing  bowl, mix the sugar, cinnamon & salt.
3. Add pecans to the egg white mixture. Stir to coat the nuts evenly
4. Toss the egg coated pecans into the sugar mixture & stir until coated. Spread the nuts out on the prepared baking sheet
 
5. Bake at 250 degrees for 1 hour, stirring every 15 minutes
P.S. I also made several batches of these with 1/2 the sugar & they turned out PERFECTLY sweet!
Related Posts Plugin for WordPress, Blogger...