It's Christmas time & we all need quick tips for homemade holiday goodies and gifts that are simple yet impressive. This one hits all the marks.
The hardest part of these no bake treats is tying the bows for the packaging. And who doesn't love the Christmas classic of peppermint bark with milk chocolate, white chocolate & CANDY CANES?!
These would be great little treats for teachers, neighbors and friends. You could also tie one onto a package or add a few to your Christmas cookie platters.
I bought my silicone molds at etsy.com last year. The person I bought them from is no longer on etsy but
THIS is the exact same mold. I bought an extra one &
I'M SHARING! See giveaway below!
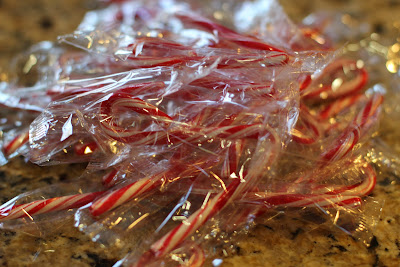
To crush the candy canes I placed them in a ziploc bag and smashed them with the handle of a big knife. Then I sifted out the candy cane dust & gave the big pieces another whack. I sprinkled each snowflake with some bigger pieces & some candy cane dust.
Be careful with the peppermint oil, mine is VERY strong & you don't want to over do it! I bought mine at
Baker's C&C, which is a local cake decorating store, but it may be available at a grocery store. Add ONE drop at a time & taste test before adding another drop.
Peppermint Bark Snowflakes
inspired by
Baked By Rachel's 2010 blog post
makes 6 peppermint snowflakes
1 cup milk chocolate chips
1 cup chopped Candiquik Vanilla Candy Coating
6-8 drops peppermint OIL (not extract)
6-8 mini candy canes, crushed
1. Melt milk chocolate chips. I use a small plastic bowl in the microwave. On medium power, cook for 1 minute &
stir, repeat at 30 second intervals until melted and smooth. Stir in 3-4 drops of peppermint oil, to taste.
2. Spoon melted milk chocolate into each mold to completely cover the bottom, 2-4 teaspoons, depending on how thick you want your bark. If needed, use the tip of a knife to spread it around a bit to make sure all of the edges & corners are covered with chocolate. Allow chocolate to set. You can move the mold on a cookie sheet into the refrigerator for 5-10 minutes to speed up the process.
4. Melt white candy coating in a plastic bowl in the microwave. On medium power, cook for 1 minutes & stir. Repeat at 30 second intervals until melted & smooth. Stir in 3-4 drops of peppermint oil, to taste.
5. Spoon 2-4 teaspoons melted candy coating into each mold over the set milk chocolate. Immediately sprinkle with crushed candy canes. Allow chocolate to set. You can move it to the refrigerator to speed up the process.
6. Remove the snowflakes from the silicone mold. They come out very easy by bending the silicone mold and peeling it away from the peppermint snowflake.
7. Wrap them up in cellophane bags, tie with a ribbon & give them to your favorite people!
P.S. be careful melting chocolate & candy coating in the microwave. If you over cook it you'll have to toss it & start over.
**GIVEAWAY IS CLOSED**
To celebrate CHRISTMAS, SNOWFLAKES & PEPPERMINT I'm giving away a silicone snowflake mold and a 16 ounce package of Vanilla Candiquik to one lucky winner. Giveaway closes Wednesday, December 12!
To enter all you need to do is STEP 1. "Like" Sprinkle Some Sunshine on FACEBOOK AND STEP 2. Come back to this blog post and leave a comment telling me what your favorite HOLIDAY TREAT is. If you already like Sprinkle Some Sunshine on FB then just leave your holiday treat comment here! To leave a comment click below where it says "1 comment" (or whatever number ) & a comment box will pop up. A random winner will be selected and notified 12/12/12.


