Showing posts with label candy. Show all posts

Thursday, December 20, 2012

microwave peanut brittle party!


Click HERE to print recipe only

I have so much fun volunteering at the Festival of Trees every year. The festival is a HUGE fundraising event benefiting Primary Children’s Medical Center.  The attractions include over 700 elaborately decorated Christmas Trees, Aisle of Wreaths, Sweet Shoppe, Gingerbread Village, Quilt Block, Playhouse Plaza, Gift Boutique, Santa Land & TONS of non-stop entertainment by local musicians, dance groups, choirs, etc. It’s a four-day Christmas party & I look forward to it every year!
I love being on the SWEET SHOPPE committee and this was my 3rd year. At the SWEET SHOPPE we sell handmade fudge, pecan rolls, chocolates, divinity, caramel apples, baked goods, toffee, truffles, brittles, popcorn balls, cotton candy, ice cream cones and every other holiday confection you can think of. Whether I’m elbow deep in the cotton candy machine or handing an ice cream cone to a child, serving at the Festival of Trees is MAGICAL!
This year besides working at the festival I helped my committee make 50 pounds of peanut brittle to sell! We were up all night mixing, stirring, breaking, weighing, packaging & labeling. The peanut brittle was DIVINE!  You probably know that I’m a failure with a candy thermometer. This recipe calls for one but you can make it without and IT’S MADE IN THE MICROWAVE. Here is a picture of the new (instant read) candy thermometer I bought & it's NOT instant read & it never got above 275 degrees with this recipe. I took it back & made many more batches of this peanut brittle without a candy thermometer at all.

The recipe is written for a 900 watt microwave. If you look inside your microwave there is probably a label that says what your microwaves wattage is. Mine is 1,000 watts so I decreased the cooking time just a bit but I don’t think it was necessary. 

I used raw Spanish peanuts because I love the flavor. I wouldn't use salted roasted peanuts. You could use raw pecans or walnuts instead.
I suggest that you have all of your ingredients measured out before you start because you need to do this quickly so it doesn’t lose it’s heat between steps. Also have several spoons ready so you can use a clean spoon every time you need to stir. 
It’s SO easy and delicious, sweet, buttery and crunchy. I have no idea where this recipe came from but it’s THE BEST! Ready, set, go!

 Peanut Brittle


2 cups sugar
1 cup white Karo syrup
2 dashes of salt
2 cups shelled raw peanuts (Pecans, Walnuts, etc.)
2 tablespoons butter
1 tablespoon baking soda
2 tsp. vanilla

1. Line a large cookie sheet with aluminum foil & butter it really well. Aluminum foil is optional but makes clean up very easy & also helps you lift the hardened brittle from the pan. 

 2. In a heavy glass bowl stir together the sugar, corn syrup and salt. It is much easier to work with if you use a bowl with a handle. I use my Pampered Chef 2 quart measuring bowl with handle. Microwave for 4 minutes. Since my microwave is 1000 watts I cooked it for 3 minutes 45 seconds but I don't think it matters.

 3. Stir in the peanuts and microwave for 2 more minutes. 

4. Stir in the butter and vanilla and microwave 7 more minutes (or until tan in color and an instant-read thermometer registers 300 degress.)  Since my microwave is 1,000 watts I cooked it for 6 minutes 45 seconds but I don't think it matters. My "instant read" thermometer never got above 275 degrees (see note about being a candy thermometer failure above) & it still worked perfectly using the cooking times instead of the thermometer readings.
5. QUICKLY stir in baking soda. Mixture will puff up. QUICKLY pour onto the prepared pan & QUICKLY spread it out thinly with a buttered spoon. Let cool.


 6. Break into pieces & enjoy! Stays very fresh for a least a couple of weeks in a sealed container. 

Friday, December 7, 2012

peppermint bark snowflakes party!


 It's Christmas time & we all need quick tips for homemade holiday goodies and gifts that are simple yet impressive. This one hits all the marks.
 The hardest part of these no bake treats is tying the bows for the packaging. And who doesn't love the Christmas classic of peppermint bark with milk chocolate, white chocolate & CANDY CANES?!
 These would be great little treats for teachers, neighbors and friends. You could also tie one onto a package or add a few to your Christmas cookie platters.

I bought my silicone molds at etsy.com last year. The person I bought them from is no longer on etsy but THIS is the exact same mold. I bought an extra one & I'M SHARING! See giveaway below!

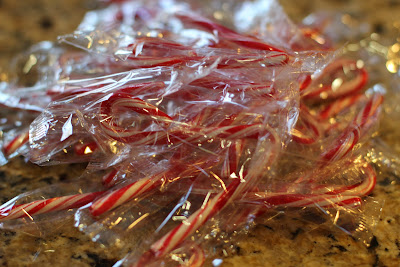
To crush the candy canes I placed them in a ziploc bag and smashed them with the handle of a big knife. Then I sifted out the candy cane dust & gave the big pieces another whack. I sprinkled each snowflake with some bigger pieces & some candy cane dust.
 Be careful with the peppermint oil, mine is VERY strong & you don't want to over do it! I bought mine at Baker's C&C, which is a local cake decorating store, but it may be available at a grocery store. Add ONE drop at a time & taste test before adding another drop.

Peppermint Bark Snowflakes
inspired by Baked By Rachel's 2010 blog post
 makes 6 peppermint snowflakes

1 cup milk chocolate chips
1 cup chopped Candiquik Vanilla Candy Coating
6-8 drops peppermint OIL (not extract)
6-8 mini candy canes, crushed

1. Melt milk chocolate chips. I use a small plastic bowl in the microwave.  On medium power, cook for 1 minute & stir, repeat at 30 second intervals until melted and smooth. Stir in 3-4 drops of peppermint oil, to taste.

2. Spoon melted milk chocolate into each mold to completely cover the bottom, 2-4 teaspoons, depending on how thick you want your bark. If needed, use the tip of a knife to spread it around a bit to make sure all of the edges & corners are covered with chocolate. Allow chocolate to set. You can move the mold on a cookie sheet into the refrigerator for 5-10 minutes to speed up the process.

4. Melt white candy coating in a plastic bowl in the microwave. On medium power, cook for 1 minutes & stir. Repeat at 30 second intervals until melted & smooth. Stir in 3-4 drops of peppermint oil, to taste.

5. Spoon 2-4 teaspoons melted candy coating into each mold over the set milk chocolate. Immediately sprinkle with crushed candy canes. Allow chocolate to set. You can move it to the refrigerator to speed up the process.

6. Remove the snowflakes from the silicone mold. They come out very easy by bending the silicone mold and peeling it away from the peppermint snowflake.
 7. Wrap them up in cellophane bags, tie with a ribbon & give them to your favorite people!

 P.S. be careful melting chocolate & candy coating in the microwave. If you over cook it you'll have to toss it & start over.

**GIVEAWAY IS CLOSED**

To celebrate CHRISTMAS, SNOWFLAKES & PEPPERMINT I'm giving away a silicone snowflake mold and a 16 ounce package of Vanilla Candiquik to one lucky winner. Giveaway closes Wednesday, December 12!

To enter all you need to do is STEP 1. "Like" Sprinkle Some Sunshine on FACEBOOK AND STEP 2. Come back to this blog post and leave a comment telling me what your favorite HOLIDAY TREAT is. If you already like Sprinkle Some Sunshine on FB then just leave your holiday treat comment here! To leave a comment click below where it says "1 comment" (or whatever number ) & a comment box will pop up. A random winner will be selected and notified 12/12/12.

Sunday, December 11, 2011

snowball truffles party!


PRINT RECIPE ONLY

It’s white chocolate & coconut! What more can I say besides DELICIOUS! These truffles would make a nice little gift & can easily be changed up with different flavors of extracts & coating. I’ve made them with almond extract instead of coconut extract & topped them with chopped almonds instead of coconut. Be daring & try lemon extract rolled in coconut. OR how about peppermint extract, topped with crushed candy canes! Use your imagination & make your wildest dreams come true with these!

They are super rich & tasty. The silky white chocolate center & the hard chocolate shell reminds me of Lindt Lindor Truffles. But guess what? Lindt doesn’t make coconut truffles, you do! Make some for Santa & I bet you will get something special in return!

You might be wondering what the difference is between white CHOCOLATE & white CANDY COATING. I use both for this recipe. I use white chocolate for the truffle center & candy coating for dipping the truffle in.

White chocolate contains cocoa butter, which is what qualifies it to be called chocolate. White chocolate also has sugar, milk fat & vanilla flavoring. White candy coating is usually sugar, oils, like partially hydrogenated stuff & more artificial flavors. White chocolate has a superior taste but the candy coating is so darn nice for dipping. Candy coating melts as smooth as butter & is much easier for dipping than chocolate. Definitely don't substitute candy coating for the white chocolate in the truffle mixture. It would probably taste good, unless you are a chocolate snob, but I think it would be too sweet. If you are a chocolate snob & don't want to use candy coating for the dipping, you can definitely use white chocolate for that too. Just add a tablespoon or 2 of shortening when melting the chocolate to smooth it out for dipping.

Snowball Truffles

ingredients:

1/3 cup heavy cream
1/4 cup butter
1 teaspoon coconut extract
12 oz. Baker's premium white chocolate or any high quality white chocolate (not candy coating)
1/2 cup powdered sugar
1 cup sweetened shredded coconut, for rolling truffles in
8 ounces white candy coating, melted for dipping

directions:

1. In a medium sized glass bowl, heat the cream, butter, extract & white chocolate in microwave at medium power for 1 minute intervals, stirring between each cooking time until chocolate is smooth & melted.

2. Stir in the powdered sugar. Refrigerate truffle mixture until firm for 1-2 hours.

3. I like my coconut shredded finer than it comes in the bag, so I pulse it a few times in the food processor. I like it even finer than I did today, but it's not even necessary at all. Place coconut in a small bowl & set aside.

4. Roll truffle mix into balls. I use my smallest cookie dough scoop to measure, which holds about 2 teaspoons. Place balls on wax paper lined baking sheet. Refrigerate or freeze while you melt the white candy coating.

5. Melt candy coating in microwave on medium power, stirring often, until melted.

6. Take truffles out of fridge & dip into melted candy coating. I use a fork for dipping. Tap on side of bowl to remove excess candy coating & place dipped truffle into the bowl of coconut. Roll in coconut & sit on waxed paper until chocolate has dried.


Thursday, December 8, 2011

peanut butter balls party!


PRINT RECIPE ONLY

Don’t you just love how a recipe can recreate memories of the past . That is one of the things about cooking that brings me joy. Peanut butter balls are a Christmas tradition that I’m passing on to my daughter. Make these once & they will become a tradition at your house too.

Who doesn’t love peanut butter and chocolate? These have a smooth rich center and chocolate coating just like Reese’s peanut butter cup. They are no-bake so your little ones will love helping.

This delicious holiday treat will disappear fast! We like them best COLD from the fridge! Crank up the Christmas carols & go make these!


Peanut Butter Balls

makes 4 dozen

ingredients:

1 1/2 cups creamy peanut butter
1/2 cup butter, softened
1 teaspoon vanilla extract
2 1/2 to 3 cups powdered sugar, see * in step 1
12 oz. semi sweet chocolate chips
2 tablespoons shortening

directions:

1. Using electric mixer, cream the peanut butter, butter & vanilla together. Add the powdered sugar a cup at a time & mix well after each addition. * BEFORE adding the last half cup of powdered sugar, test the mixture. You want it to be stiff, not too sticky, and NOT CRUMBLY. It needs to hold together in a ball. You may need more or less powdered sugar depending on how creamy your peanut butter is.You may not need the last half cup of powdered sugar, depending on how creamy your peanut butter is.

2. Roll into balls. I use my smallest cookie dough scoop to measure, which holds about 2 teaspoons. Place balls on wax paper lined baking sheet. Refrigerate or freeze for about 30 minutes to firm up.


3. Melt chocolate chips & shortening. I melt half the chocolate/shortening to start & melt the rest as needed . I use the microwave on medium power, cooking for 1 minute & stirring, repeating until melted and smooth. I use a small plastic bowl. You can use a doubler boiler instead of the microwave.


4. Take pb balls out of the fridge & dip into chocolate. I used to have THESE TOOLS, which I loved when I first started dipping chocolates. Now I've found that a fork is just as easy for me. I put a pb ball into the chocolate & scoop some chocolate over the top of it. Then lift the chocolate covered ball out with a fork, tap the fork on the side of the bowl to allow excess chocolate to drip back into the bowl. You can also carefully scrape the bottom of the fork on the side of the bowl to remove excess chocolate. Then use a toothpick to carefully scoot the chocolate covered pb ball off the fork & onto the wax paper.

5. Allow to sit for an hour or pop them in the fridge to set up quicker.


Related Posts Plugin for WordPress, Blogger...