Showing posts with label dessert. Show all posts

Thursday, November 14, 2013

pina colada cupcake frosting party!

I had a request for pina colada cupcakes and went right to work experimenting with flavors and recipes to come up with something spectacular. I started by adding coconut & pina colada drink mix to an old fashioned pineapple upside down cake recipe. YUM! But the BIG STAR of the show was the pina colada FROSTING and that’s the recipe I want to share with you immediately.
It's SO delicious; I think I would scrap the cake & just serve shots of this frosting! It is the perfect tropical delight for those warm summer days by the pool cold winter evenings by the fire! Yes, it’s the middle of November & I’m STILL in denial that summer is over. One taste of this & I'm back to July! My recipe is alcohol free but you could definitely add rum or rum extract to the recipe for the authentic pina colada kick.
I used THIS non-alcoholic Master of Mixes Pina Colada Mixer & it’s so good. It’s basically lots of sugar, cream of coconut & pineapple juice. It’s available at most grocery stores. If you prefer not to use it, you may substitute equal parts of pineapple juice and cream of coconut. Another unusual frosting ingredient I used is Jello brand Coconut Cream Instant Pudding mix, just the dry powder, straight out of the box. 

Pina Colada Frosting
click here to print the recipe only
Yields: 3 cups frosting

1/3 cup dry Jello Coconut Cream Instant Pudding mix (a full box has about 1 cup)
1/3 cup pina colada drink mix
½ teaspoon vanilla extract
1 ½ teaspoon coconut extract or to taste (you may prefer 1 teaspoon)
2 tablespoons pineapple juice
½ cup salted butter
½ cup solid vegetable shortening
4 cups confectioners sugar
OPTIONAL: ¼ teaspoon rum extract OR 2 teaspoons light rum

1.     In a small bowl, add instant pudding mix, pina colada mix, vanilla extract, coconut extract, pineapple juice & rum or rum extract, if using. Whisk together until thick and smooth. Set aside.
2.     In a large separate bowl, cream butter and shortening with electric mixer.
3.     Add pudding mixture to creamed butter mixture.
4.     Add confectioners sugar one cup at a time, beating well on medium speed after each addition until smooth and fluffy. If thinner frosting is desired, add additional pineapple juice.

This makes enough frosting for 24 cupcakes, decorated as shown. I garnished them with toasted coconut*, fresh pineapple slices & well drained maraschino cherries. 

*To toast coconut in the microwave, place 1 cup sweetened shredded coconut on a paper plate, cook on high with set microwave for one minute. Don't walk away. Watch it like crazy & pull it out several times and stir it up and put it back in until perfectly toasted. It will take less than 2 minutes.


Sunday, August 18, 2013

grandma clark's zucchini bread party!


I’m so thankful that I grew up with two sets of doting grandparents. I’m blessed to have known all of my grandparents and have many years and memories with them. My grandmothers couldn’t have been more different but they were both wonderful examples to me of living a simple life, having high morals and spreading seeds of love.
Today marks 7 years that my Grandma Clark has been in heaven. My grandparents met when grandpa was 6 years old and grandma was 4. Grandpa was in first grade; he went home that day and announced to his mother that he had met his future wife. They were engaged on Christmas day when grandma was a senior in high school. She spent the summer after her graduation making quilts, sewing pillowcases and canning vegetables to prepare for their wedding. They were married for 53 years before Grandpa passed away in 1992.

Grandma and Grandpa Clark lived on a 140 acre farm, their favorite book was The Bible and they believed that every meal should include bread and butter. Grandma loved having family over for lunch and you could count on lunch being at noon, straight up, 12:00, don’t be late. If you were lucky it would include her cubed steak and brown gravy. If you were really lucky it would include mashed potatoes and her famous chicken and noodles.

As a very young child one thing I loved about mealtime at Grandma Clark’s house was that they had SOFT margarine that came in a little plastic tub. Oh, it was very special, no wonder I licked it off my bread  and asked for more. No one else I knew had little plastic tubs of soft margarine. I would slather it on the cornmeal mush Grandma would fry for breakfast. I would wash it down with a big glass of orange TANG. It was full of sugar but Grandma served it for breakfast and I loved it.

She must have had a hundred of those little plastic butter tubs in her cupboard and she put them to very good use. They had a huge chest freezer in the basement and grandma would buy many different flavors of ice cream, her favorite dessert. She’d divide it into the plastic butter tubs and label it for individual servings. The freezer was full of ice cream in butter tubs and you would think you were at an ice cream parlor when she opened the heavy freezer lid. After dinner we would go to the freezer and ponder the flavors as grandma would read them to me. I would consider each one and take my time deciding, knowing there was no where else in the world to have this opportunity except at Grandma Clark’s house. I was just about as tall as the freezer and I can still feel the excitement I felt when the ice cold air hit my face, waiting a millisecond for the mini cloud of vapor to clear so I could see all of the little bowls of ice cream neatly labeled and stacked.  It was usually a battle between chocolate and butter pecan. Inevitably someone else at the dinner table would claim to have the same dilemma so I’d grab one of each and we’d split them both.

To remember Grandma today I made her delicious zucchini bread.  It’s simple with the perfect sweetness and full of cinnamon and walnuts. It freezes well and makes a great little after school snack or giveaway treat.
I love you, Grandma! My kitchen smells like yours tonight. xo
Grandma Clark's Zucchini Bread

click HERE to print recipe only

ingredients

3 eggs
2 cups sugar
1/2 cup oil
1/2 teaspoon baking powder
1 teaspoon baking soda
1/2 teaspoon salt
4 teaspoons cinnamon
1/4 teaspoon ground nutmeg
2 teaspoons vanilla extract
3 cups flour
2 cups shredded zucchini (I put the shredded zuke in a strainer and press the excess water out of it.)
2 cups chopped walnuts or pecans 

directions

1. Preheat oven to 325 degrees. Grease loaf pans. I also like to line the greased loaf pans with greased parchment paper. 

 2. Beat eggs, sugar and oil. You can use an electric mixer but I use a whisk. 
3. Stir in baking powder, baking soda, salt, cinnamon, nutmeg and vanilla.
4. Stir in flour. Batter will be VERY thick. If you started with a whisk, trade it for a wooden spoon. 

5. Stir in zucchini.  Stir in nuts.

6. Bake in 2 greased loaf pans for 50 minutes to one hour. I baked it in two smaller loaf pans for 40 minutes and made 24 mini muffins, baked for 15 minutes. 

To test doneness, insert a toothpick into the center of the bread. If it comes out clean, or with only a few moist crumbs attached to it, it's done.

Grandma always served this with whipped cream. Enjoy!  

Tuesday, August 14, 2012

peanut butter sandwich treat party & giveaway!


Raise your hand if you're sad that summer is winding down & back to school is getting close. I honestly LIVE for Summer. I barely survive Winter every year & I really need to live somewhere that has a longer Summer season (like Southern California)! Very few people love Summer best of all the seasons but I definitely DO love Summer best!
We had so much fun on our summer trip to Southern California & had some EXTREMELY yummy treats. One of them being this amazing peanut butter sandwich from Disneyland. And you guessed it, I came home & re-created it just for you...well...and me! Here is a pic of the one I ate at Disneyland. Graham cracker, peanut butter & chocolate PERFECTION!

Peanut Butter Sandwich Treat
makes 6 treats

6 graham crackers
1/2 cup peanut butter
1/2 cup powdered sugar
1/4 teaspoon vanilla extract
Chocolate for dipping (I used chocolate Candiquik today) but you could also use the chocolate chip/shortening combo in the pb balls recipe linked above.

1.  Mix peanut butter, powdered sugar & vanilla with a fork in a bowl & stick it in the freezer to firm up a bit.

2. Melt chocolate (Candiquik melts beautifully in the microwave) & brush one side of the graham crackers with melted chocolate using a pastry brush. 

3. Scoop peanut butter mixture on top of chocolate side of the graham crackers. I used about 2 tablespoons of pb mixture per cracker. Spread pb evenly to edges of cracker.
4. Place crackers in freezer for a bit to firm up the pb.

 
5. Reheat the chocolate if needed. Dip the pb graham crackers into chocolate. I set them in the bowl of melted chocolate, one at a time, & spooned the melted chocolate over the top. Then lift the cracker out of chocolate with a fork & tapped the fork on the side of the bowl so extra chocolate drips off into the bowl. 

6. Place on waxed paper or parchment paper & allow chocolate to set up. I drizzled extra melted chocolate over the top. Store in refrigerator & serve very cold.
 
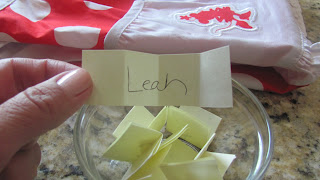
Giveaway is closed! Congrats to Leah!! The cute Minnie apron is on it's way to you!

 AND...to celebrate SUMMER I'm sharing this adorable Polka Dot Minnie Mouse Apron (pic below is from www.disneystore.com). It's adult size & super playful & fun!

To enter all you need to do is 1. "Like" Sprinkle Some Sunshine on FACEBOOK and 2. Come back to this blog post & leave a comment telling me where your very favorite vacation ever was OR where your dream vacation would be. If you already like Sprinkle Some Sunshine on FB then just leave your vacation comment here! To leave a comment click below where it says "1 comment" (or whatever number) & a comment box will pop up. A random winner will be selected Sunday night, 8/19/12 and notified. Please leave your email address or someway to contact you.

Monday, July 30, 2012

strawberry cheesecake sundae party!


If you’re looking for the perfect way to cool down on a hot summer day, then look no further. This special sundae made with vanilla ice cream, real whipped cream, CHEESECAKE and fresh strawberries will do the trick!
This creative combination was inspired by the fast food drive thru restaurant, Ralley's aka Checkers. We don't have Ralley's or Checkers in Utah but my mom told me about this amazing dessert & on a recent trip to Indiana I HAD to try it. It was everything she said & more! But I dare say, homemade is even better!

As soon as I got home I set out to recreate the strawberry cheesecake sundae. I googled it to get another look at it & low & behold I found a video of the restaurant's VP of research & development making one! That was EASY! Feel free to skip the rest of this post & click the video below to watch Mr. V.P. do his thing.


I must warn you about this Philadelphia Cheesecake Filling...it's DANGEROUS. Only buy it if you have a plan to use the whole thing, divided by 8 people, immediately . If it sits in the fridge unattended for more than a day it will do a magic trick & disappear from your fridge & reappear on your hips! I will probably never buy it again...it's that risky decadent! I also think it would be delicious piped into strawberries.

I made homemade strawberry sauce but this is a super quick & simple dessert! You could make it even easier with store bought strawberry syrup & just throw a few fresh strawberries in.
sundae ingredients:

Graham crackers, crushed in food processor
Philadelphia cheesecake filing
Strawberry Sauce, see below
Additional sliced strawberries 
Vanilla bean ice cream
Whipped cream

sundae directions:

Layer the following in each individual sundae dish:
 
1 tablespoon crushed graham crackers
1 ice cream scoop Philadelphia cheesecake filling (1/4 cup)
1 tablespoon of strawberry sauce
sliced strawberries
4 large swirls vanilla soft serve (or 3 scoops vanilla ice cream)
2 tablespoons strawberry sauce
sliced strawberries
1 tablespoon crushed graham cracker
2 puffs real whipped cream (more!)
Cherry (Strawberry!)
For Strawberry Sauce: Clean & slice 1 pound strawberries, place in a saucepan and stir in 1/3 cup sugar and 1 teaspoon vanilla extract. Cook, stirring occasionally, over medium heat for 5 minutes. Remove from heat and puree in a blender until smooth. Will thicken upon cooling. Store in refrigerator and serve cold. This will make lots of extra sauce. Delicious served over cheesecake or ice cream or use it in smoothies or milkshakes or drizzle over pound cake or crepes!


Monday, July 9, 2012

watermelon rice krispies treats party!


I feel very blessed to be part of the organization, Desserts for the Deserving. Desserts for the Deserving was established in 2011 with the sole purpose of bringing a little bit of sunshine to the lives of strangers. Bloggers, bakers & crafters offer their time and resources and are matched up with a family or individual who has been nominated for a random act of kindness.

The family I have been matched up with is Derrick & Ruth & their children. I know a batch of cookies will not ease the pain they are suffering from the very recent loss of their beautiful sweet baby. I have been praying for them since the day I received their nomination. I hope they know that people care about them & love them, even strangers.

Today I spent several hours thinking of Derrick & Ruth while I prepared cinnamon rolls, peanut butter-chocolate chip-oatmeal cookies (minus the m&ms) and these Rice Krispies treats! I packaged them up & shipped them off. I think these would brighten your day too! They are a snap to make & would be a fun no-bake treat for a Summer BBQ or kid's birthday party.

I saw these ADORABLE rice krispies treats from last year at Dine & Dish and couldn't wait to make them. Their recipe calls for strawberry flavored marshmallows and lime Kool-Aid but I just couldn't adulterate the scrumptious classic Rice Krispies Treats recipe. So I used food coloring to make my watermelon & rind.

Watermelon Shaped Rice Krispy Treats

ingredients

6 Tablespoons butter, divided in 2
6 cups mini marshmallows, divided in 2
8 cups Rice Krispies, divided in 2
Green & red food coloring
chocolate chips or raisins for "seeds"

1. Melt 3 tablespoons butter in a large saucepan over medium heat. Add 3 cups mini marshmallows & stir until melted. Remove from heat & stir in some green food coloring until its the color you want. I just poured a bit from the bottle. I didn't measure but it was probably about 1/2 teaspoon. Stir in 4 cups Rice Krispies until completely coated.

2. Scoop green Krispies mixture into a well buttered 9 inch round cake pan. Butter your hands or a spoon and press it around the outer edge of the cake pan to form a ring. Set aside. Wash your large saucepan so you can reuse it for the red.


3. Repeat step 1 except add red food coloring. At this point my teenager came in the kitchen & said, "Why in the world are you making a Christmas wreath in July?" I said, "You'll see."

4. Scoop red Krispies mixture into the center of the cake pan. Press to be level with the green outer ring.


5. After mixture completely cools place a few raisins or chocolate chips on top as seeds. Turn pan upside down to remove from pan. Slice into wedges & serve or put them on lollipop sticks & package for gifts! I cut mine into 8 large wedges but you could definitely cut it smaller. I promise no one will mistake them for Christmas wreaths!

Friday, January 13, 2012

apple crostata AKA flat apple pie party


PRINT RECIPE ONLY

I would love to be a Food Network star but you know who I really want to be? JEFFREY (Ina Garten’s husband)! He hangs out at his house all day, typing on his computer or sitting on his gorgeous front porch reading a book & The Barefoot Contessa brings him delicious & lovingly prepared food three times a day. She pours his wine & butters his bread.

I have several of Ina’s cookbooks & I always have great results with her recipes. She’s not my favorite Food Network star to watch but the lady can cook! Today I made this beautiful Apple Crostata from Ina Garten & it was so much better than apple pie. I increased the ingredients for the cinnamon sugar topping because that's my favorite part.

I'm sure Ina is super nice in real life but her air of sophistication sometimes comes across as snobbish, in my opinion. The way she tells her viewers to “only use the best ingredients” bugs me. Duh, Ina, I'm going to use the “best ingredients” I can afford. But I’m not going to have live lobsters shipped to me to make your seafood bisque. And I don’t have an orchard outside my East Hampton Estates mansion or organic farmer’s markets in my small town. So yeah, if my tomato is a few days past ripe, I’m still going to use it.

Disclaimer: I’m probably just jealous. Ina is giving us under-achieving wives a bad name. We make our husbands go to work everyday & force them to microwave their own leftovers & butter their own bread after a hard day. If we catch them relaxing with a book, we nag that the Christmas lights are still up. Yep, jealous! I want to be Jeffrey!

Apple Crostata AKA Flat Apple Pie

ingredients

for the pastry:

1 cup all-purpose flour
2 tablespoons granulated sugar
1/4 teaspoon salt
1/4 pound (1 stick) very cold unsalted butter, diced
2-3 tablespoons ice water

for the filling:

1 1/2 pounds McIntosh, Macoun, or Empire apples (3 large) *see note on step 5
1/4 teaspoon grated orange zest
1/3 cup flour
1/3 cup granulated sugar
1/4 teaspoon kosher salt
1 teaspoon ground cinnamon
1/8 teaspoon ground allspice
6 tablespoons cold unsalted butter, diced

directions

1. For the pastry, place the flour, sugar, and salt in the bowl of a food processor fitted with a steel blade. Pulse a few times to combine. Add the butter and pulse 12 to 15 times, or until the butter is the size of peas. Add the ice water and keep hitting the pulse button to combine, but stop the machine just before the dough becomes a solid mass.


2. Turn the dough onto a well-floured board and form into a disk. Wrap with plastic and refrigerate for at least 1 hour.

3. Preheat the oven to 450 degrees F.

4. Flour a rolling pin and roll the pastry into an 11-inch circle on a lightly floured surface. Transfer the pastry to a parchment paper lined baking sheet.

5. For the filling, peel, core, and cut the apples into 8ths. I actually cut my 1/8's in half because I wanted to make sure my apples cooked thoroughly. Cut each wedge into 3 chunks. *I like to use a mix of tart & sweet apples so I used 1 of each: Granny Smith, Fuji & Jonagold. It was perfect! Toss the apple chunks with the orange zest. You won't taste the orange zest at all, but it brightens the flavors of the apples.

6. Cover the tart dough with the apple chunks leaving a 1 1/2-inch border.

7. Combine the flour, sugar, salt, cinnamon, and allspice in the bowl of a food processor fitted with a steel blade. Add the butter and pulse until the mixture is crumbly. Pour into a bowl and rub it with your fingers until it starts holding together. Sprinkle evenly on the apples.

8. Gently fold the border over the apples to enclose the dough, pleating it to make a circle.

9. Bake the crostata for 30 to 40 minutes, until the crust is golden and the apples are tender. I had to cover the edges with foil for the last 10 minutes because they browned too quickly. Allow to cool.

10. Serve warm or at room temperature with a little caramel sundae, dusted with cinnamon on the side.
Note: If you don't have a food processor, just use a pastry cutter. I don't usually use my food processor for pastry because my food processor is small. But this recipe worked perfectly in it & made it SO easy.
Related Posts Plugin for WordPress, Blogger...