Thursday, December 20, 2012

microwave peanut brittle party!


Click HERE to print recipe only

I have so much fun volunteering at the Festival of Trees every year. The festival is a HUGE fundraising event benefiting Primary Children’s Medical Center.  The attractions include over 700 elaborately decorated Christmas Trees, Aisle of Wreaths, Sweet Shoppe, Gingerbread Village, Quilt Block, Playhouse Plaza, Gift Boutique, Santa Land & TONS of non-stop entertainment by local musicians, dance groups, choirs, etc. It’s a four-day Christmas party & I look forward to it every year!
I love being on the SWEET SHOPPE committee and this was my 3rd year. At the SWEET SHOPPE we sell handmade fudge, pecan rolls, chocolates, divinity, caramel apples, baked goods, toffee, truffles, brittles, popcorn balls, cotton candy, ice cream cones and every other holiday confection you can think of. Whether I’m elbow deep in the cotton candy machine or handing an ice cream cone to a child, serving at the Festival of Trees is MAGICAL!
This year besides working at the festival I helped my committee make 50 pounds of peanut brittle to sell! We were up all night mixing, stirring, breaking, weighing, packaging & labeling. The peanut brittle was DIVINE!  You probably know that I’m a failure with a candy thermometer. This recipe calls for one but you can make it without and IT’S MADE IN THE MICROWAVE. Here is a picture of the new (instant read) candy thermometer I bought & it's NOT instant read & it never got above 275 degrees with this recipe. I took it back & made many more batches of this peanut brittle without a candy thermometer at all.

The recipe is written for a 900 watt microwave. If you look inside your microwave there is probably a label that says what your microwaves wattage is. Mine is 1,000 watts so I decreased the cooking time just a bit but I don’t think it was necessary. 

I used raw Spanish peanuts because I love the flavor. I wouldn't use salted roasted peanuts. You could use raw pecans or walnuts instead.
I suggest that you have all of your ingredients measured out before you start because you need to do this quickly so it doesn’t lose it’s heat between steps. Also have several spoons ready so you can use a clean spoon every time you need to stir. 
It’s SO easy and delicious, sweet, buttery and crunchy. I have no idea where this recipe came from but it’s THE BEST! Ready, set, go!

 Peanut Brittle


2 cups sugar
1 cup white Karo syrup
2 dashes of salt
2 cups shelled raw peanuts (Pecans, Walnuts, etc.)
2 tablespoons butter
1 tablespoon baking soda
2 tsp. vanilla

1. Line a large cookie sheet with aluminum foil & butter it really well. Aluminum foil is optional but makes clean up very easy & also helps you lift the hardened brittle from the pan. 

 2. In a heavy glass bowl stir together the sugar, corn syrup and salt. It is much easier to work with if you use a bowl with a handle. I use my Pampered Chef 2 quart measuring bowl with handle. Microwave for 4 minutes. Since my microwave is 1000 watts I cooked it for 3 minutes 45 seconds but I don't think it matters.

 3. Stir in the peanuts and microwave for 2 more minutes. 

4. Stir in the butter and vanilla and microwave 7 more minutes (or until tan in color and an instant-read thermometer registers 300 degress.)  Since my microwave is 1,000 watts I cooked it for 6 minutes 45 seconds but I don't think it matters. My "instant read" thermometer never got above 275 degrees (see note about being a candy thermometer failure above) & it still worked perfectly using the cooking times instead of the thermometer readings.
5. QUICKLY stir in baking soda. Mixture will puff up. QUICKLY pour onto the prepared pan & QUICKLY spread it out thinly with a buttered spoon. Let cool.


 6. Break into pieces & enjoy! Stays very fresh for a least a couple of weeks in a sealed container. 

Tuesday, December 11, 2012

sugar spiced pecans party!

 
These spiced pecans give me a flashback to 1987, living in Indiana & working at Columbus Bank & Trust. We had a certain daily customer, stiletto high heeled, platinum Barbie haired, short skirted (mostly leopard print), gorgeous, construction business owner, probably in her late 50’s who brought us a pound of spiced pecans every Christmas & we devoured them like a pack of hungry wolves.
The main reason I hated quitting that job was those spiced pecans. I worked there for 4 years & begged her every year for the recipe & she refused to share it.  From time to time I’d find a recipe for spiced pecans & try it & it was never the same as hers. In fact, a few years ago I tracked her down & let her know that I moved 1,500 miles away, 20 years had passed & Columbus Bank & Trust doesn’t even exist anymore. I asked her again if she’d share her recipe with me & I swore on the Bible that I wouldn’t share it with a living soul. The answer was still NO. Can you believe that? Well guess what, sexy lady? I cracked the code to your spiced pecans & the recipe couldn’t be easier!

If you make these for someone I can pretty much GUARANTEE that they will NEVER forget you! They will be talking about you on the world wide web 25 years from now. This is proof! What are you waiting for? Go make someone’s day…namely YOURS!
Sugar Spiced Pecans
adapted from www.allrecipes.com

1 pound pecan halves
1 egg white
2 teaspoons water
1 teaspoon vanilla extract
1 cup granulated sugar
½ teaspoon salt
1 teaspoon ground cinnamon

1. Preheat oven to 250 degrees. Spray baking sheet with non-stick spray.

2. In a large mixing bowl, whisk the egg white, water & vanilla together until frothy, with a fork.

 3. In a separate large mixing  bowl, mix the sugar, cinnamon & salt.
3. Add pecans to the egg white mixture. Stir to coat the nuts evenly
4. Toss the egg coated pecans into the sugar mixture & stir until coated. Spread the nuts out on the prepared baking sheet
 
5. Bake at 250 degrees for 1 hour, stirring every 15 minutes
P.S. I also made several batches of these with 1/2 the sugar & they turned out PERFECTLY sweet!

Friday, December 7, 2012

peppermint bark snowflakes party!


 It's Christmas time & we all need quick tips for homemade holiday goodies and gifts that are simple yet impressive. This one hits all the marks.
 The hardest part of these no bake treats is tying the bows for the packaging. And who doesn't love the Christmas classic of peppermint bark with milk chocolate, white chocolate & CANDY CANES?!
 These would be great little treats for teachers, neighbors and friends. You could also tie one onto a package or add a few to your Christmas cookie platters.

I bought my silicone molds at etsy.com last year. The person I bought them from is no longer on etsy but THIS is the exact same mold. I bought an extra one & I'M SHARING! See giveaway below!

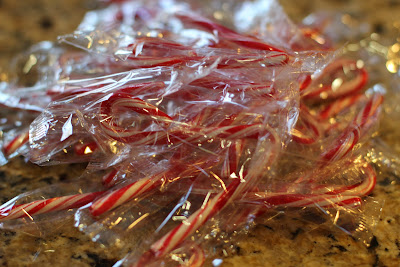
To crush the candy canes I placed them in a ziploc bag and smashed them with the handle of a big knife. Then I sifted out the candy cane dust & gave the big pieces another whack. I sprinkled each snowflake with some bigger pieces & some candy cane dust.
 Be careful with the peppermint oil, mine is VERY strong & you don't want to over do it! I bought mine at Baker's C&C, which is a local cake decorating store, but it may be available at a grocery store. Add ONE drop at a time & taste test before adding another drop.

Peppermint Bark Snowflakes
inspired by Baked By Rachel's 2010 blog post
 makes 6 peppermint snowflakes

1 cup milk chocolate chips
1 cup chopped Candiquik Vanilla Candy Coating
6-8 drops peppermint OIL (not extract)
6-8 mini candy canes, crushed

1. Melt milk chocolate chips. I use a small plastic bowl in the microwave.  On medium power, cook for 1 minute & stir, repeat at 30 second intervals until melted and smooth. Stir in 3-4 drops of peppermint oil, to taste.

2. Spoon melted milk chocolate into each mold to completely cover the bottom, 2-4 teaspoons, depending on how thick you want your bark. If needed, use the tip of a knife to spread it around a bit to make sure all of the edges & corners are covered with chocolate. Allow chocolate to set. You can move the mold on a cookie sheet into the refrigerator for 5-10 minutes to speed up the process.

4. Melt white candy coating in a plastic bowl in the microwave. On medium power, cook for 1 minutes & stir. Repeat at 30 second intervals until melted & smooth. Stir in 3-4 drops of peppermint oil, to taste.

5. Spoon 2-4 teaspoons melted candy coating into each mold over the set milk chocolate. Immediately sprinkle with crushed candy canes. Allow chocolate to set. You can move it to the refrigerator to speed up the process.

6. Remove the snowflakes from the silicone mold. They come out very easy by bending the silicone mold and peeling it away from the peppermint snowflake.
 7. Wrap them up in cellophane bags, tie with a ribbon & give them to your favorite people!

 P.S. be careful melting chocolate & candy coating in the microwave. If you over cook it you'll have to toss it & start over.

**GIVEAWAY IS CLOSED**

To celebrate CHRISTMAS, SNOWFLAKES & PEPPERMINT I'm giving away a silicone snowflake mold and a 16 ounce package of Vanilla Candiquik to one lucky winner. Giveaway closes Wednesday, December 12!

To enter all you need to do is STEP 1. "Like" Sprinkle Some Sunshine on FACEBOOK AND STEP 2. Come back to this blog post and leave a comment telling me what your favorite HOLIDAY TREAT is. If you already like Sprinkle Some Sunshine on FB then just leave your holiday treat comment here! To leave a comment click below where it says "1 comment" (or whatever number ) & a comment box will pop up. A random winner will be selected and notified 12/12/12.

Tuesday, October 30, 2012

pumpkin shaped bread bowls and witch finger bread sticks party!

Today I made a quick batch of my FRENCH BREAD ROLLS, added some food coloring and came up with some pumpkin shaped bread bowls & witch finger bread sticks. They were delicious served with a caldron of witch's brew (cheesy cream of broccoli soup). My ghosts and goblins were in Halloween heaven!
 The only change in the original recipe is to add food coloring after step number two. I used gel food coloring & mixed red and yellow to make orange. Liquid food coloring would work great too. After step number two, I divided the dough and colored 3/4 of the dough orange and 1/4 of the dough green in separate bowls. Then continue on with the original recipe at step three for kneading, rising, etc.
Shape rolls as desired. The recipe made 4 pumpkin shaped bread bowls and 8 bread sticks. I also baked some dough around a wooden spoon to have vines for the pumpkins. The bread bowls were slightly smaller than my usual bread bowls since I used a lot of the bread dough for the green. The pumpkin stems take very little green dough. For the witch fingers I used sliced almonds for fingernails & brushed a little red food coloring on them for blood.

Bake the bread sticks for about 10 minutes at 400 degrees until slightly browned on the bottom & the bread bowls for about 15-17 minutes. If you make the vine wrapped around the wooden spoon, brush some oil on the wooden dowel before you wrap the dough around it and bake for about 5 minutes. Prop the ends of the spoon onto the edges of the pan so the dough is not touching the pan. After baking and cooling, carefully wrap your hand around the dowel/vines & wiggle until the bread becomes loose, then slide the vine off the stick and break it into spiral pieces. 


Monday, October 22, 2012

pumpkin chocolate chip cookies party!


If you like my pumpkin chocolate chip muffins you MUST try these cookies! This one is the recipe jackpot for pumpkin lovers!

The recipe is from Cutler's Cookies, a much loved sandwich shop & bakery in Utah. When I worked downtown Salt Lake City, Cutler's was my favorite place to eat lunch. 1/2 a turkey avocado sandwich on their homemade honey wheat bread & one of their famously SOFT cookies was such a treat! Cutler's very generously shared their recipe with A Bountiful Kitchen & Si shared it on her blog. Thanks to both of you! Cutler's moved their downtown location to Davis County so if you are ever in Bountiful, Centerville or Layton, UT stop by Cutler's, you'll be SO glad you did! I also love their chicken salad sandwich with cashews and sprouts!
Here is the secret to Cutler's SUPER SOFT cookies: They always use CAKE FLOUR. It has less gluten and less protein and creates a lighter texture than all-purpose flour.
Cake flour is sold in a box & can be found by the cake mixes or the baking supplies in your grocery store. I was skeptical that it would make a difference but wow, these cookies are so soft & light & yummy! I'm sure these would be great with all-purpose flour too but try cake flour if you can.
Cutler's Pumpkin Chocolate Chip Cookies
recipe from A Bountiful Kitchen

makes 36 large cookies-recipe can easily be halved

1 cup softened butter
3 cups granulated sugar
2 eggs
2 cups pumpkin
2 teaspoons vanilla
2 teaspoons cinnamon
1 teaspoon nutmeg
1/2 teaspoon ground cloves
5 cups CAKE flour
1 teaspoon salt
2 teaspoons baking powder
2 teaspoons baking soda
2 cup chocolate chips

1. Preheat oven to 375 degrees.

2. Using an electric mixer, beat butter and sugar together for about 2 minutes or until smooth. Add eggs, pumpkin, vanilla and spices. Continue beating for an 2 additional minutes.

3. Add flour, salt, baking powder and baking soda to the bowl & mix just until flour disappears and all ingredients are combined. Stir in chocolate chips.
4. Using a large cookie or ice cream scoop (mine holds 1/4 cup) place dough onto parchment lined baking sheets or lightly greased cookie sheets. These are large cookies. I only fit 6 cookies at a time on my cookie sheets 
 5. Bake at 375 degrees for 10-12 minutes. Let cool completely on baking sheet before transferring to cooling rack.
P.S. The original recipe says to bake at 350 degrees but I needed to raise it to 375.


Related Posts Plugin for WordPress, Blogger...